

Workshop on practical slide-making
Saturday 10th February 2024
Chris Thomas opened the workshop in the PA135 meeting room in the Natural History Museum with some cautions about the materials and equipment we would be using, including fragile glass slides, acetic acid (white vinegar) and a hot plate. He provided white vinegar for cleaning slides, water with a little washing-up liquid to spread solutions, copper tape, spring clips, neat and diluted PVA glue, strips of 1 mm card, a saturated solution of vitamin C, feathers, shark teeth, some sand and some forams. The participants had been asked to bring their own blank slides, small brushes, scissors, paper and a pen or a pencil.
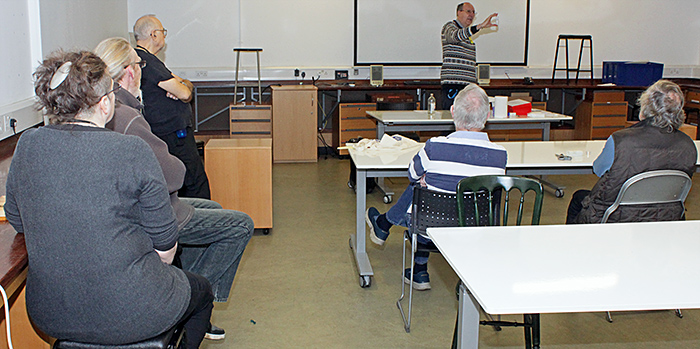 Chris Thomas opening the meeting
Vitamin C
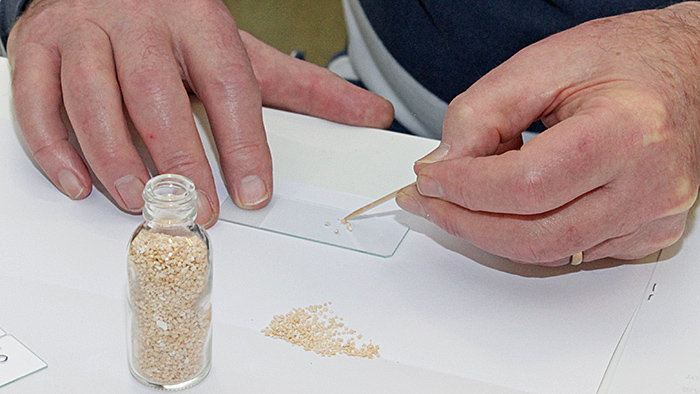
Chris brought a tube of saturated vitamin C (L-ascorbic acid) solution that included some undissolved solids, and showed us how to use a pipette to transfer a drop to a blank slide. We could expect different results by leaving the drop or by spreading it thinly before drying it on the hot plate. We could also try to change the way in which crystals form by scratching the film while it is still damp, or by including small seed crystals.
 Taking one drop of vitamin C solution
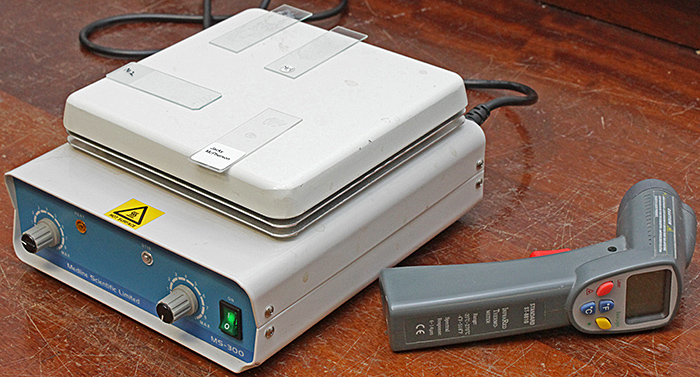
A hot plate was provided for drying solutions and glue, with an infrared thermometer to check its temperature.
 Hot plate with crystal slides
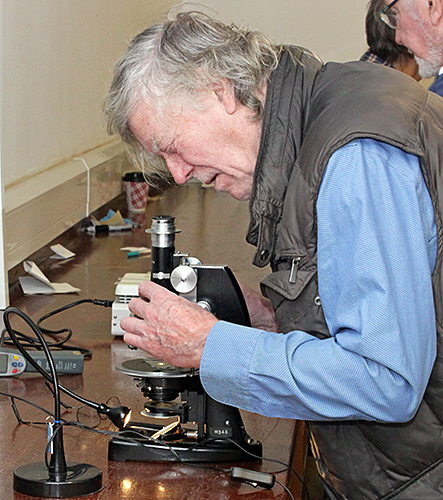
We used the Club’s J. Swift & Son polarising microscope to look at our dried slides under crossed polarisers.
 Danny Ferri with Swift polarising microscope
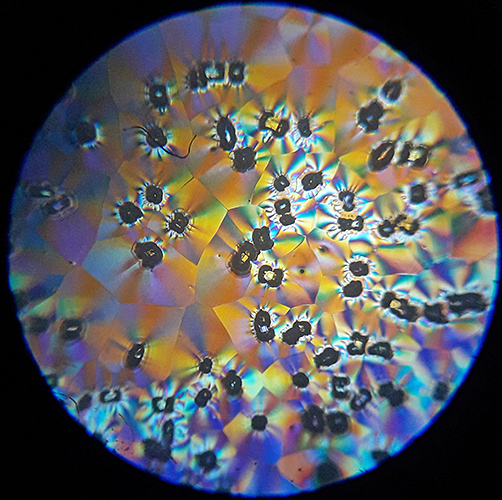
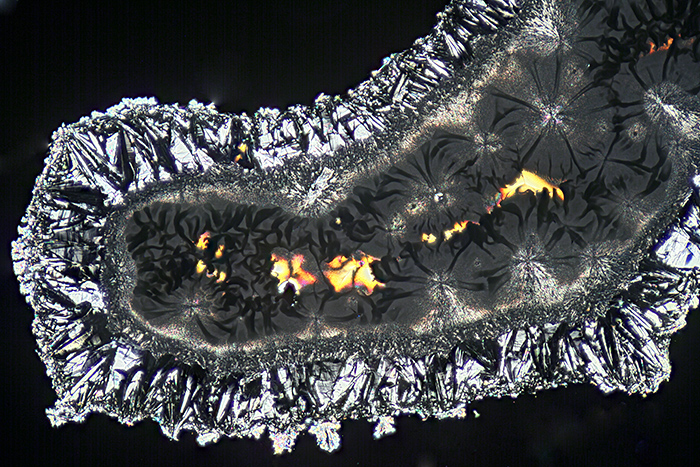 Vitamin C crystals (crossed polarisers)
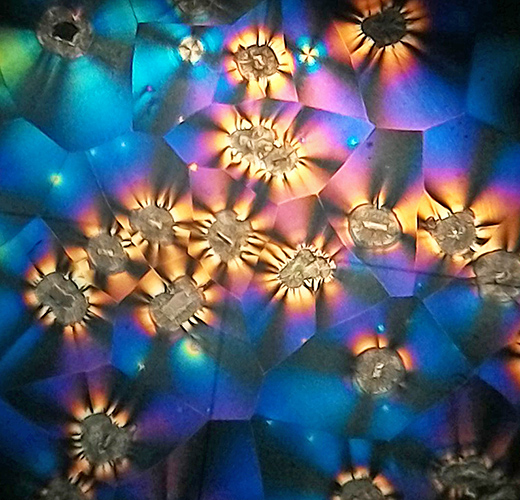
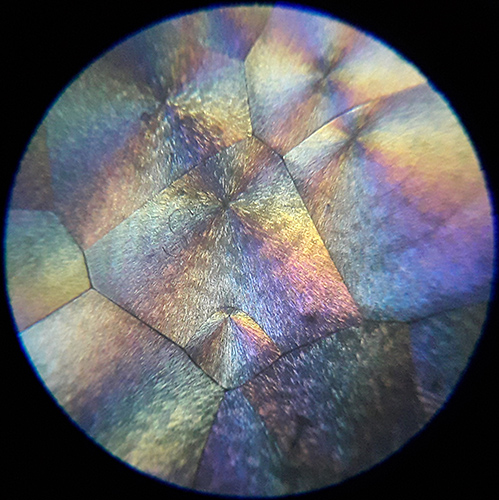 Vitamin C crystals (crossed polarisers) [By Lisa Ashby]
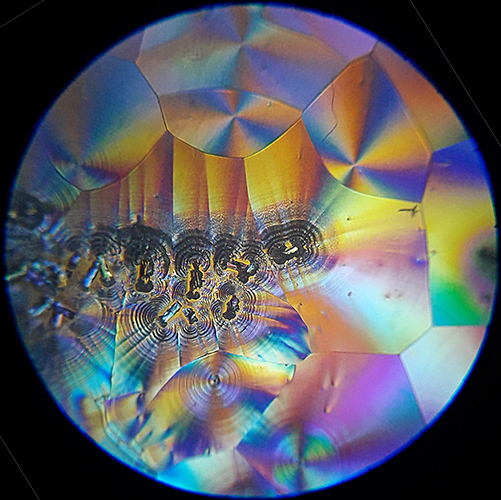 Vitamin C crystals (crossed polarisers) [By Lisa Ashby]
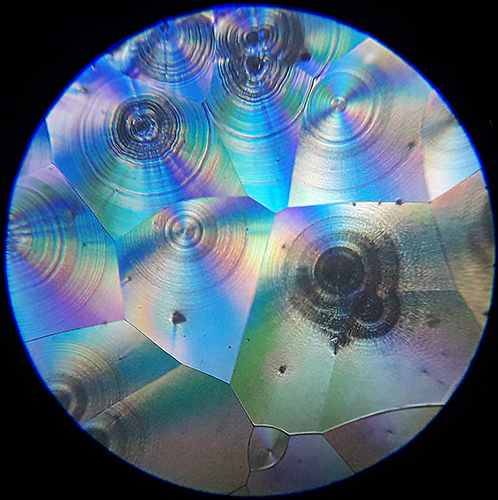 Vitamin C crystals (crossed polarisers) [By Lisa Ashby]
 Vitamin C crystals (crossed polarisers) [By Lisa Ashby]
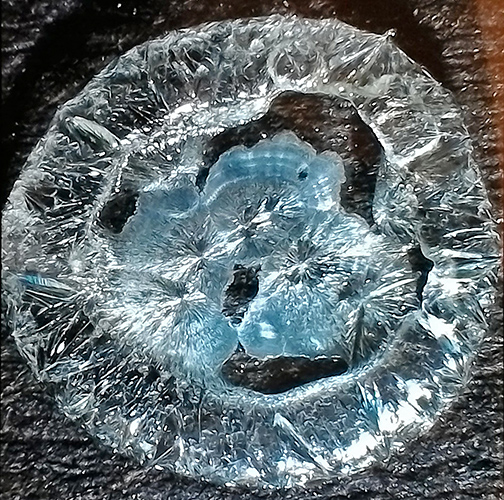
 Vitamin C seed crystal (crossed polarisers) [By Jacky McPherson]
 Vitamin C crystals (crossed polarisers) [By Pam Hamer]
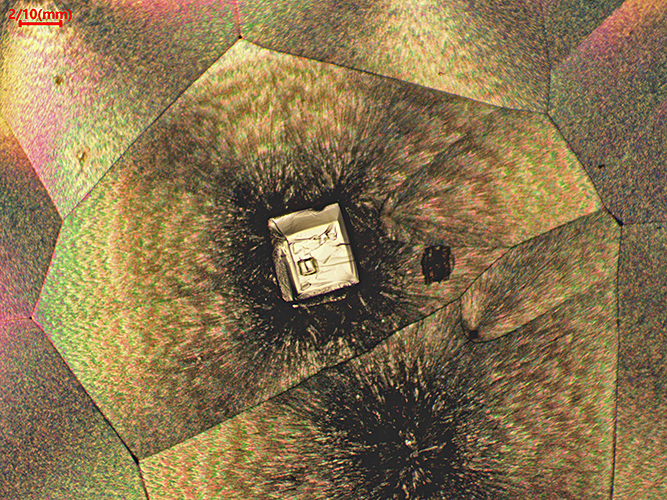
 Vitamin C crystals under digital microscope [By Pam Hamer]
Feathers and wings
At the 2023 Annual Exhibition of Microscopy, Michael Horwood showed lots of butterfly wings held between pairs of slides with the edges sealed with copper tape.
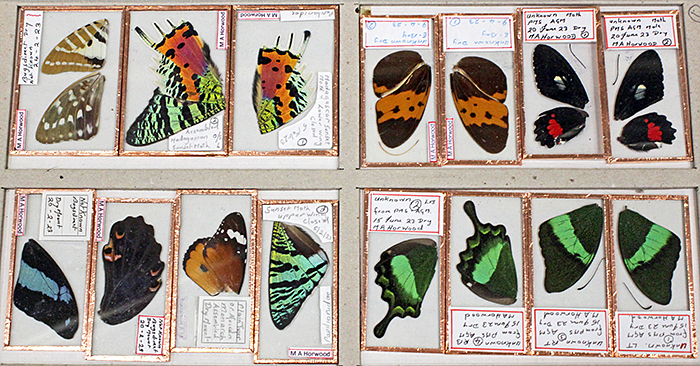 Michael Horwood’s slides of butterfly wings
Chris found that Amazon (and other places) sells rolls of copper tape with adhesive on one side. It comes in various widths, and 6 mm is just right for binding pairs of slides. To hold the slides together while they are being bound, Chris used pairs of clamps that Gordon Brown recommends (sold as stainless steel clothes pegs on Amazon and eBay).
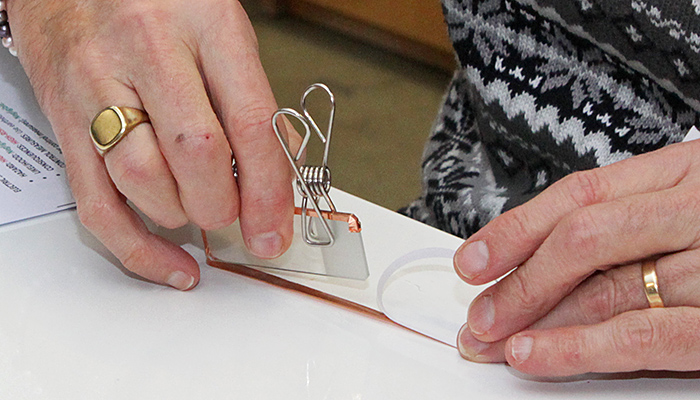 Binding slides with copper tape
For our first attempts, Chris provided downy feathers from a young blackbird (Turdus merula) that had died after flying into a window. For our second attempts, Chris provided some colourful peacock (Pavo cristatus) feathers.
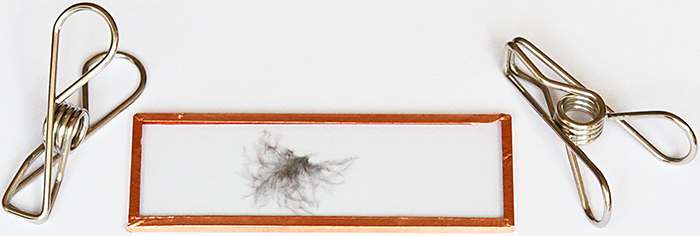 Slide of blackbird feather with copper tape and clamps
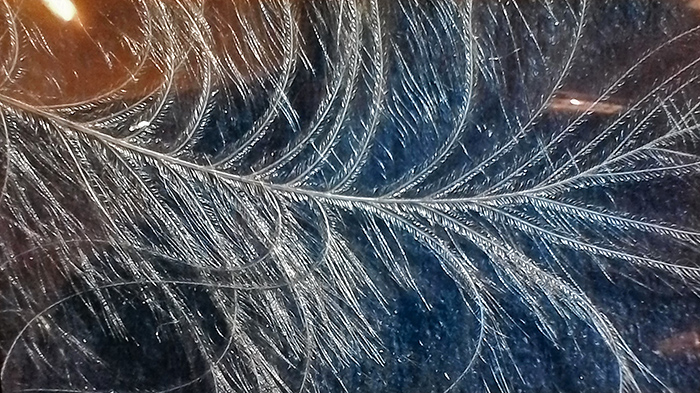 Blackbird feather under digital microscope [By Pam Hamer]
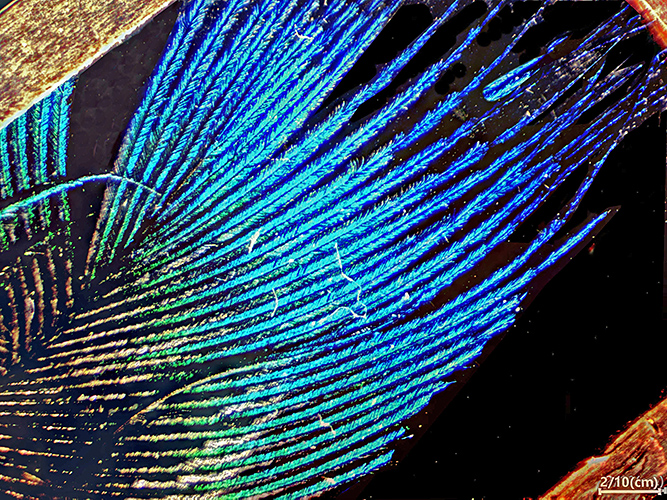 Peacock feather [By Jacky McPherson]
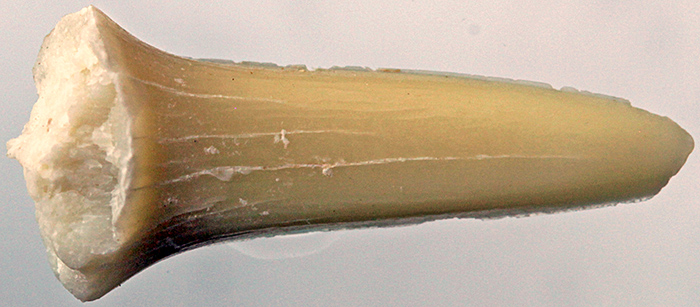
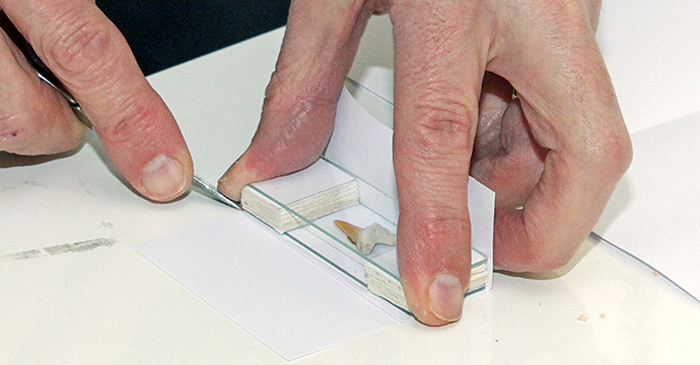
Sharks teeth
Sharks teeth are quite thick and heavy, so they need to be firmly attached to a slide.
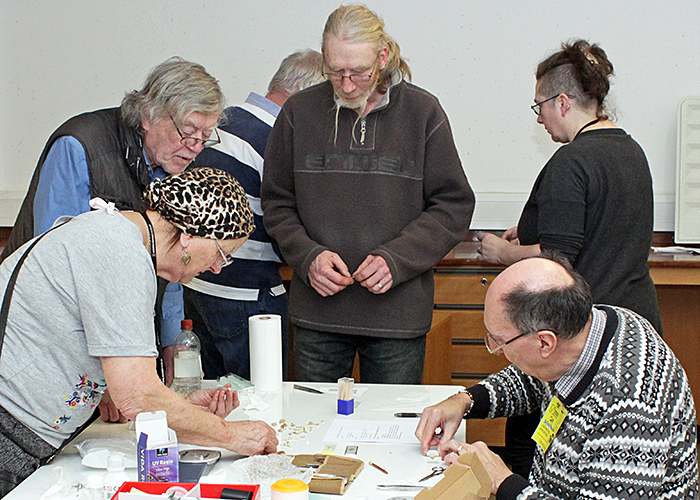 Selecting shark teeth
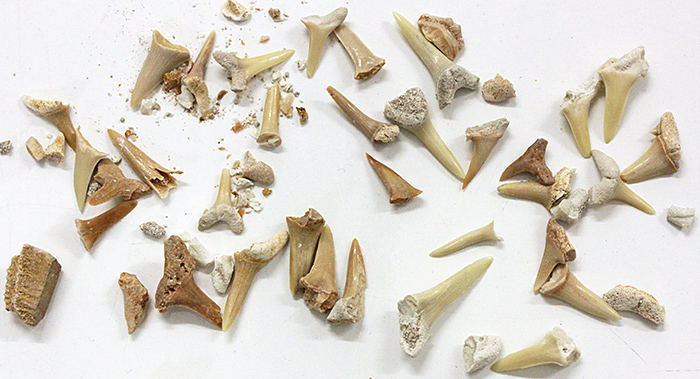 Shark teeth
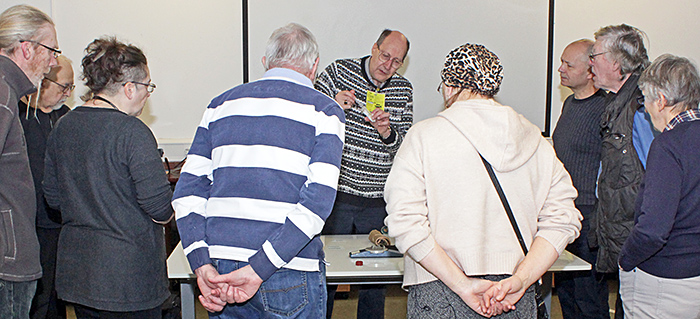
Chris showed us a simple method for finding the centre of a slide: draw round the slide, then draw diagonals, and the centre is where the diagonals cross. To fasten the tooth to the slide, we used a tiny drop of Vida Rosa UV Resin, cured by holding the slide over a UV torch for 60 seconds. To get a tiny drop, squeeze one drop from the bottle onto a spare slide, then use a toothpick to transfer a tiny amount to the centre of the real slide. Vida Rosa sets hard, so it is better than LOCA for this application.
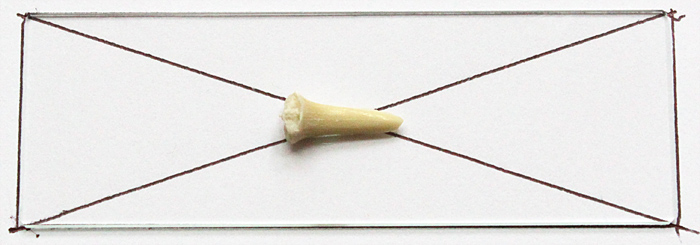 Guide for centring shark teeth
 Shark tooth
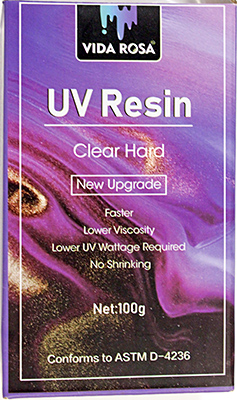 Vida Rosa UV Resin
Sand
Chris showed us how to paint a circle of diluted PVA glue on a slide using a ringing turntable. Then sprinkle sand onto the glue, turn the slide over and tap off the excess sand. The sand can be protected by adding a 3″×1″ piece of 1 mm card with a central hole.
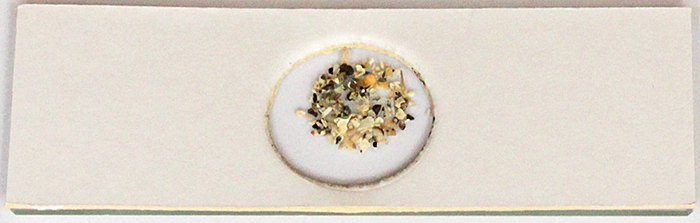 Card cover for protecting sand
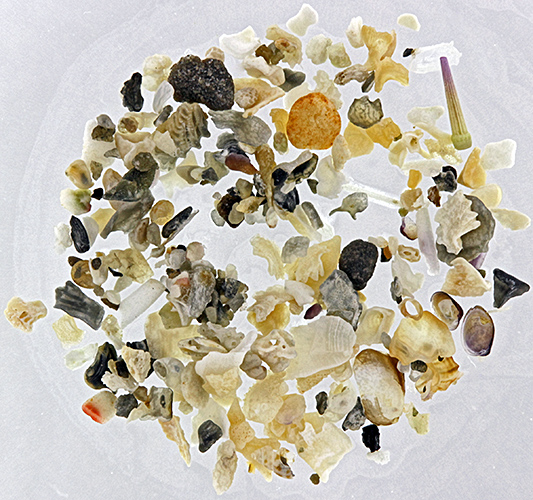 Orkney sand
Forams
Forams could be mounted in the same way as sand, but they can also be carefully positioned. Chris placed a tiny drop of undiluted PVA glue on a slide using a toothpick. Then he moistened a toothpick, used it to pick up a foram, and transferred the foram to the drop of glue. Chris kindly provided star sand forams (Baculogypsina sphaerulata) so that we could try mounting and arranging them.
 Mounting forams
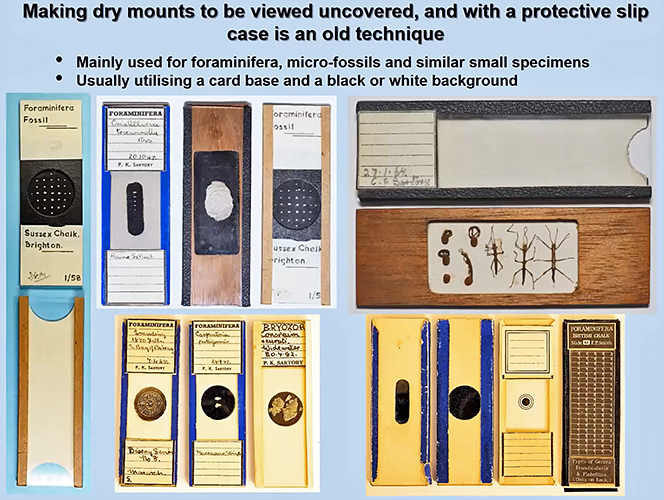
Protective covers
In a Zoom meeting in November 2023, Carel Sartory showed us how to make slip cases for microscope slides, and Chris gave us a demonstration of his own techniques.
 Carel Sartory’s slip cases
At each end of the slide, Chris created a small pile of 1 mm card rectangles, fixed together and fixed to the slide with PVA glue. The piles need to be a little taller than the specimen. A blank slide rests on the piles; it will be part of the cover, so it is not attached to the piles. A 3″×1″ piece of paper is temporarily placed under the slide while the cover is made; when this is removed, the cover will not be too tight a fit. Chris cut, scored and folded a piece of white 120 gsm paper wrapped around the mount. It overlaps and is glued to the top slide by a few millimetres using PVA glue.
With the temporary spacer removed, the cover slides easily on and off the slide. The specimen can be seen through the top slide. Specimen labels can be glued to the top of the cover. Thumb notches can be cut in the paper.
 Making a slip-in slide cover
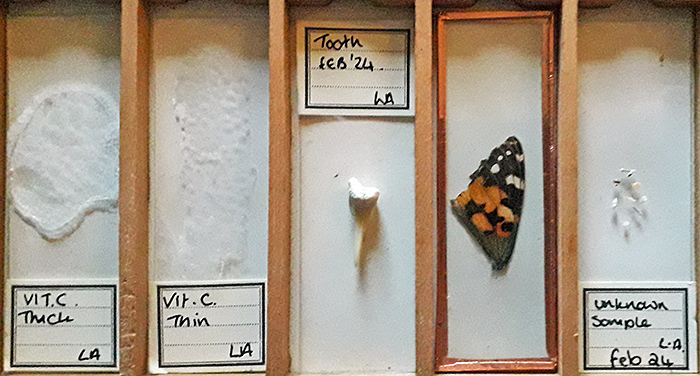
Finished slides
 Dry-mounted slides by Lisa Ashby [By Lisa Ashby]
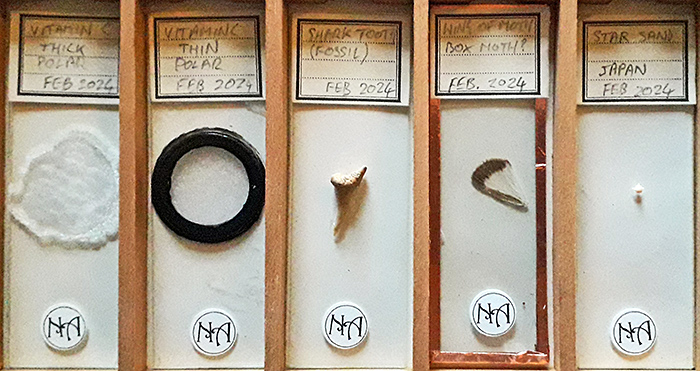 Dry-mounted slides by Nigel Ashby [By Lisa Ashby]
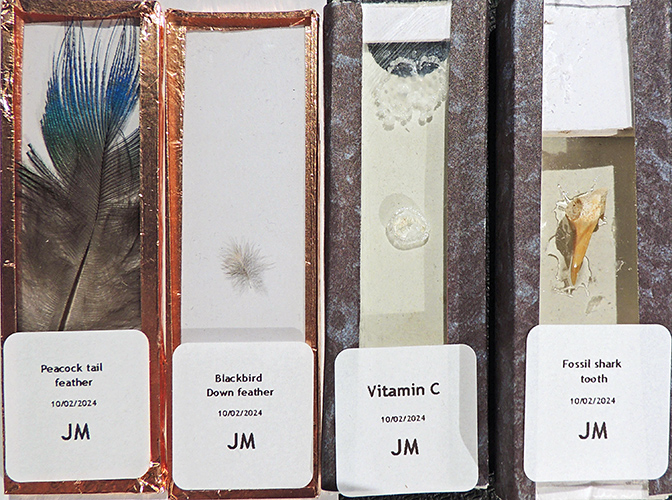 Dry-mounted and covered slides by Jacky McPherson [By Jacky McPherson]
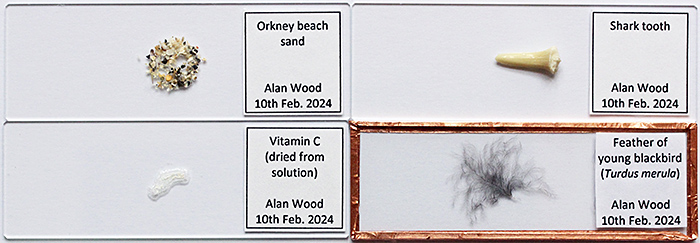 Dry-mounted slides by Alan Wood
Report and most photographs by Alan Wood