

Bournemouth Natural Science Society
Joint meeting with the Quekett Microscopical Club
Saturday 25th July 2020
This meeting was scheduled to be held in Bournemouth in the Lecture Hall of the Victorian building that houses the Bournemouth Natural Science Society, but was instead held online using Zoom, because of the COVID-19 epidemic. Paul Smith and Grenham Ireland managed the technical side, and Grenham managed the participants. Details had been e-mailed to BNSS and Quekett members in advance so that they could prepare their presentations.
Quekett members can watch the video of the meeting.
Jeremy Poole informed and entertained us with videos of diatoms moving, illustrations of the structure of a pennate diatom, valve and girdle views of a centric diatom, SEMs of the diatom frustule, diagrams of vegetative and sexual reproduction, SEMs of frustules, SEMs of marine diatoms, old and new theories on how diatoms move, and diatoms in art. You can see Jeremy’s slides in this PowerPoint:
Click the arrows to move through the slides. Click the symbol at bottom right for a larger version.
Pam Hamer wanted to demonstrate that rock samples can be polished flat on one side with simple equipment and then observed and photographed with a simple stereomicroscope. The equipment is easy to obtain and is safe for children to use. For soft rock such as limestone it takes about 15 minutes to polish a surface so that it is ready for viewing. Harder rocks such as granite take longer and need more effort.
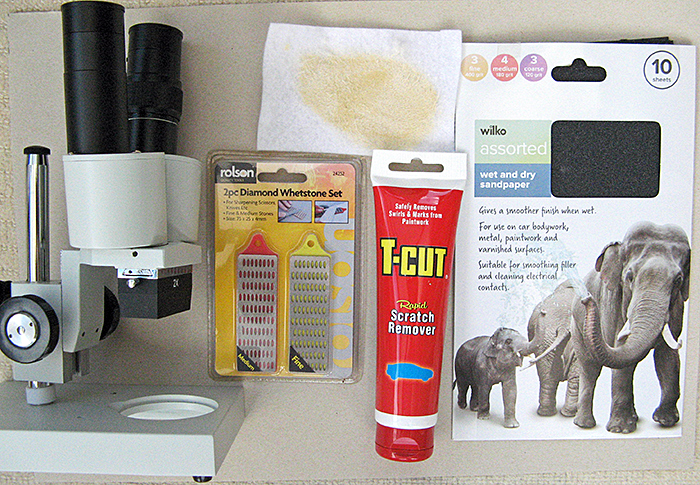 Tools for polishing rocks
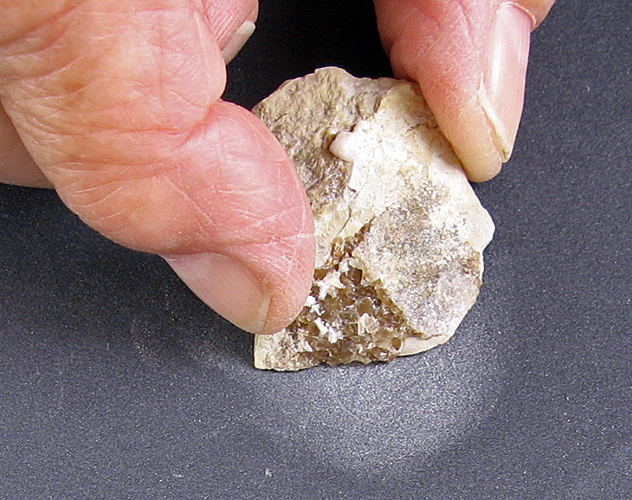
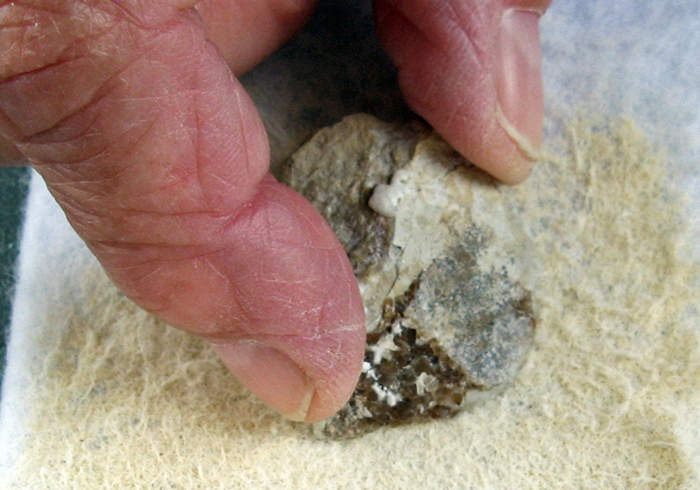
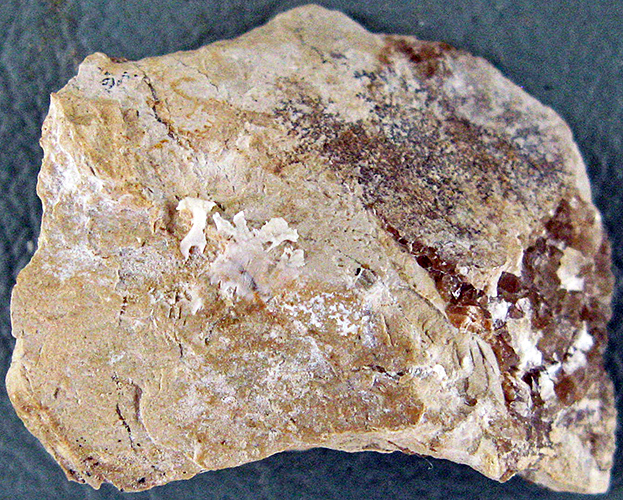 Unpolished rock, 2–3 cm across, from the spoil heap at the disused St Alban’s Head quarry in Dorset
Pam polishes rocks in 4 stages, with increasingly fine abrasives. For the first stage, Pam uses coarse Wilko wet and dry sandpaper, about 120 grade, to get an approximately flat surface.
 Polishing rock with sandpaper
For the second stage, she uses Rolson 24252 Diamond Whetsones with a bit of water; starting with the red one that is equivalent to about 200 grade wet and dry sandpaper. Check to see if there are any interesting features that you do not want to destroy. The yellow one is about 200–300 grade and is used to take off the main scratches.
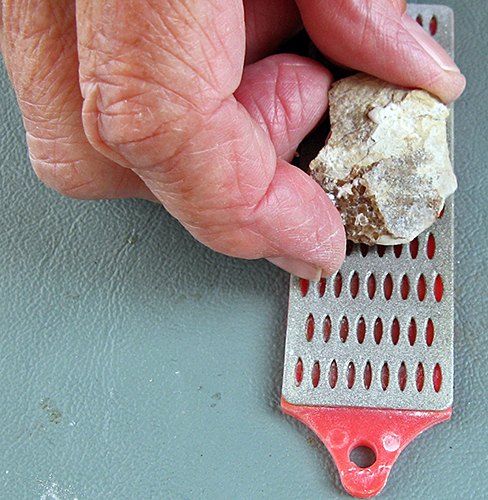 Polishing rock with diamond whetstone
Pam then uses fine 1200 grade wet and dry sandpaper (800 grade can also be used) with a bit of water to remove more of the scratches.
For the final stage, Pam uses T-Cut Rapid Scratch Remover (intended for removing scratches from the paintwork of cars) applied with felt or blotting paper to get a really smooth surface. Some rocks can be polished to a shiny surface, but others can only be made smooth.
 Polishing rock with scratch remover
Then brush off the dust under a tap with an old toothbrush and examine it under a stereomicroscope. This specimen has nice fine grain and some fossilised material, and intergrowth of crystals in the gap.
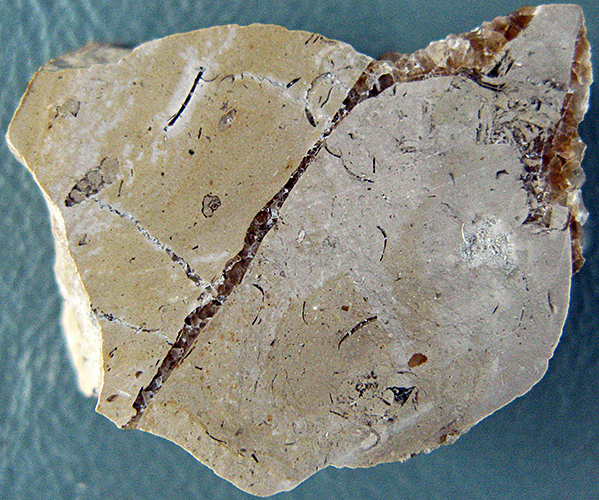 Polished rock
There is information about microfossils on the website of the Kent Geologists’ Group, with some illustrations to help with identification.
The following photographs of rock inclusions and polished rocks were taken using a simple digital camera (Brunel Digital Eyecam) and the small stereomicroscope shown in Pam’s first photo, with top lighting.
 Inclusion in polished rock, 1 mm, probably a foraminifera
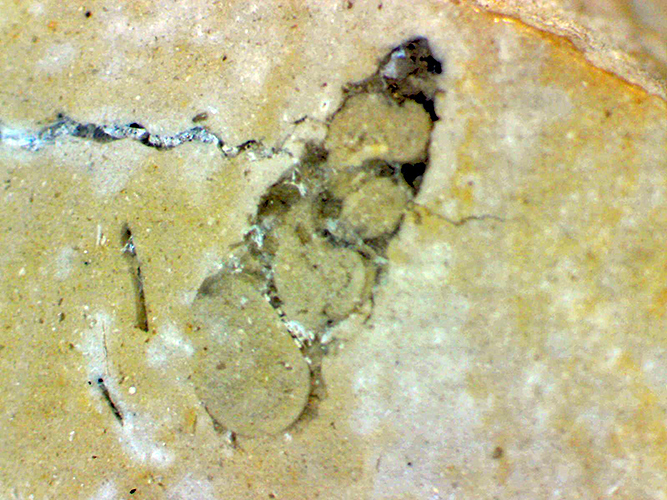 Inclusion in polished rock, 2 mm, perhaps a juvenile gastropod
 Inclusions in polished rock from Church Cliffs at Lyme Regis, including coral, gastropods and foraminifera
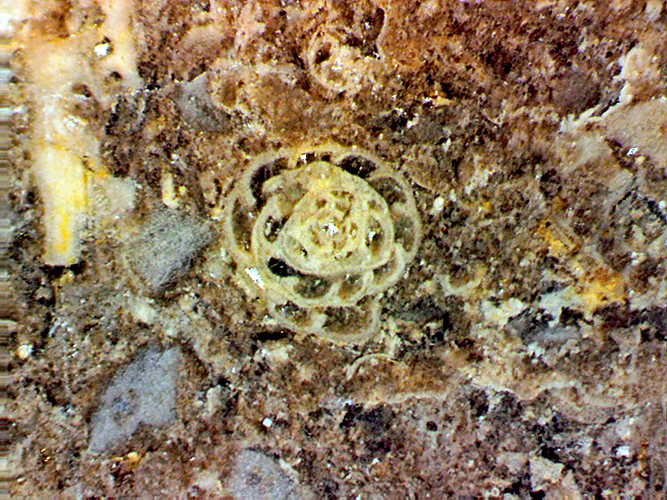 Inclusions in polished rock from the Peak District, the central one is probably an ammonite
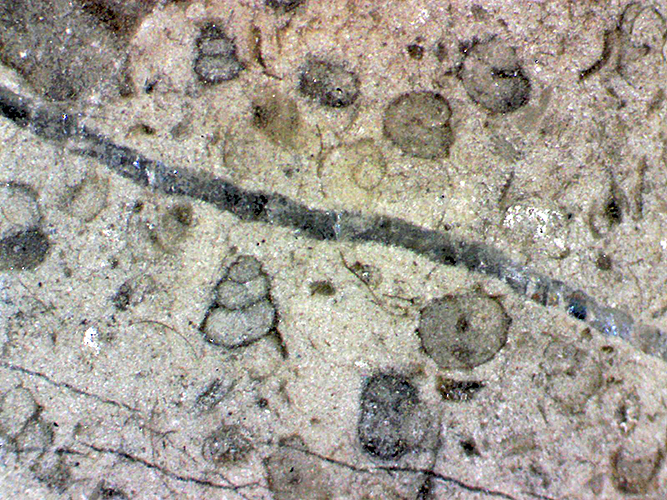
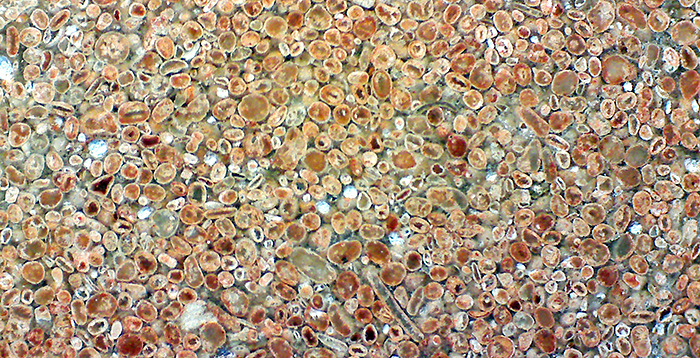 Polished rock showing ooliths, from Kirtlington Quarry in Oxfordshire, field of view about 10 mm.
Rock sections are normally ground to a standard thickness of 30 µm, a process that needs specialist equipment. Pam had been experimenting with her polishing technique and had managed to produce sections that provided useful information, although they were not even and not very thin. She polishes one surface and then glues that surface to a slide with Wilko Glass Glue. Then she polishes the other side of the section as thin as she can. When she is happy with the section she adds a few drops of Wilko Glass Glue on top and adds a coverslip.
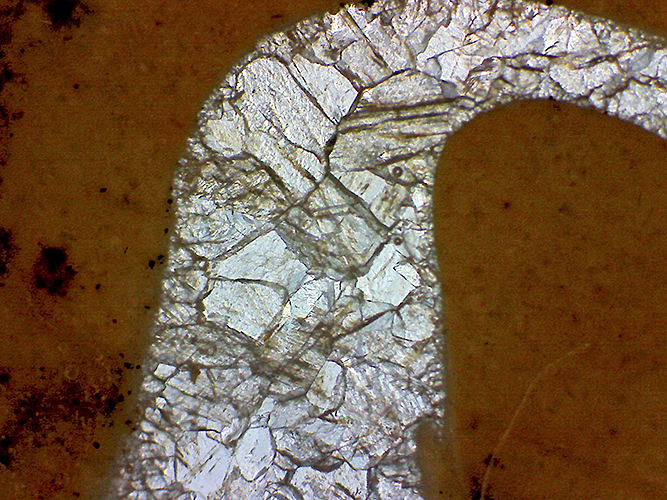 Polished rock section by transmitted light, oolitic limestone where fossilised material has been replaced by crystal growth
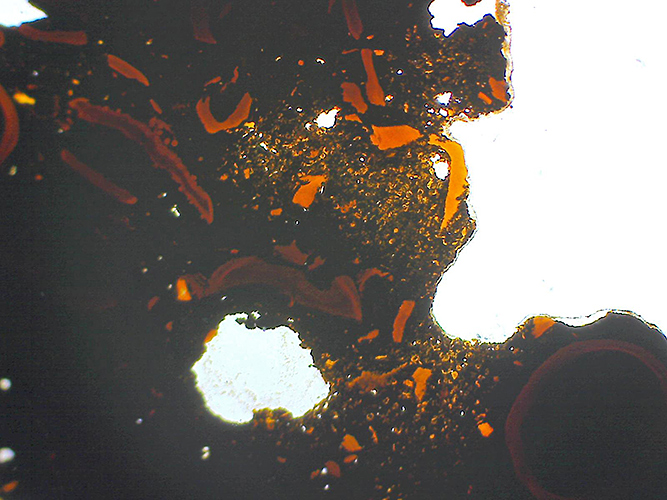 Section of stone from Robin Hood Bay, probably a soft coal, showing remains of vegetable material
Pam’s images are all in a new leaflet that will be given away at outreach events to encourage youngsters and families to use microscopes. The leaflet will also be available as a free download.
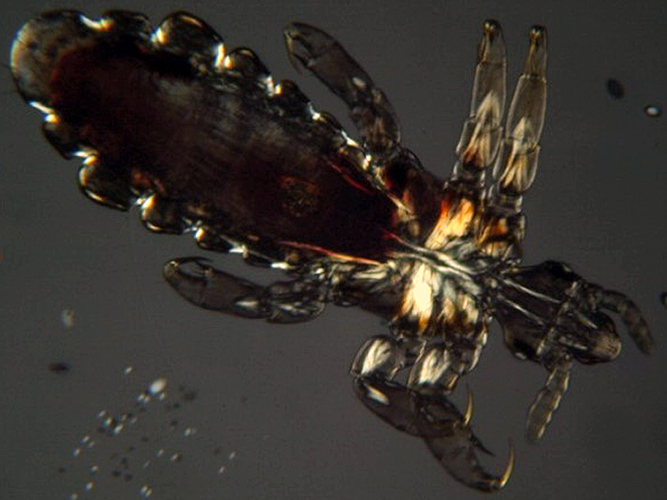
Chris Thomas told us that his children once had head lice (Pediculus humanus capitis) when they were young, and that his wife kept specimens for him. Under the microscope, he could see their claws that enable them to move easily along hairs.
 Head louse
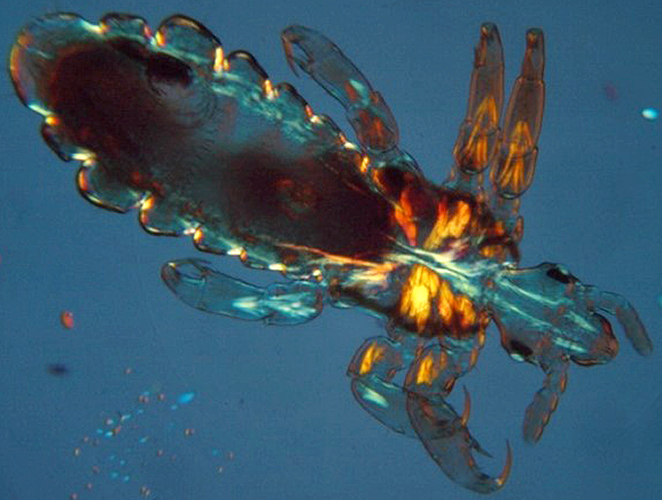
The muscles in mounted specimens of head lice appear bright under polarised light:
 Head louse (crossed polarisers)
Adding a retarder changes the colours in the specimen and the background, and rotating the retarder changes the colours.
 Head louse (crossed polarisers plus retarder)
Chris showed a PowerPoint presentation with several slides to show how polarising filters only allow light waves with a precise orientation to pass through, so that 2 polarising filters at right angles block almost all light, a condition called extinction. When a specimen that exhibits birefringence is placed between the crossed polarisers, it changes the orientation of some light waves so that they pass through the second polariser; birefringent parts of the specimen thus become visible and may also be coloured. Adding a retarder (also known as a wave plate) changes the colour of the background and parts of the specimen. Rotating the specimen and/or one of the polarisers and/or the retarder changes the colours and the affected parts of the specimen. You can see Chris’s slides in this PowerPoint:
Click the arrows to move through the slides. Click the symbol at bottom right for a larger version.
Chris wanted to produce a stacked image for improved depth of field, but he also wanted to capture the different colours. To do this, he took more than the usual one photo at each focus point, rotating the retarder to vary the colours. He then combined all of the photos in his stacking software. He originally used Helicon Focus for stacking. As a retarder, he recommended one or two layers of the clear plastic used to protect greetings cards.
Graham Matthews has recently been investigating the invertebrates that can be found in leaf litter at Warnham Local Nature Reserve. He explained the equipment that he uses to collect, prepare and observe the specimens, and showed us examples of the springtails, beetles, mites, spiders and pseudoscorpions that he has collected. You can see Graham’s notes and photographs in this PowerPoint:
Click the arrows to move through the slides. Click the symbol at bottom right for a larger version.
A Tullgren funnel is useful for extracting specimens, and Graham showed how to make one from a 2 litre soft drink bottle. Specimens can be difficult to identify, and Graham recommended asking for help in the Soil Biodiversity UK Facebook group. As a permanent mountant, Graham uses Brunel Alcoholic Mountant, and has been experimenting with LOCA. For arranging specimens for photography, Graham puts them in a shallow cell on a slide in a gel of HPMC (also known as hypromellose and hydroxypropyl methylcellulose). It can be difficult to avoid air bubbles in filled cells, one tip is to put a drop of mountant near the edge of the coverslip and then turn it over and carefully lower it onto the cell. Another tip is to make sure that there is a positive meniscus of the mountant, then tilt the coverslip, apply it to the edge of the meniscus and carefully lower it.
Alan Wood gave an introduction to polarised light microscopy, explaining the minimum equipment that is needed (2 polarisers) and showing some of the colourful results that can be obtained. You can see Alan’s photographs and notes in this PowerPoint:
Click the arrows to move through the slides. Click the symbol at bottom right for a larger version.
Alan then switched to a live view through his Olympus BH-2 microscope (using a Canon EOS digital SLR controlled by EOS Utility) and showed how to rotate one polariser to achieve extinction (the darkest image) on a clear part of the slide. Then he moved the specimen (a thin rock section) into view to show the colours produced by crossed polarisers, and showed how they change when the slide is rotated. Then he added a retarder on top of the polariser to show how it changes the background and foreground colours, and showed the effect of rotating the specimen, the polariser and the retarder.
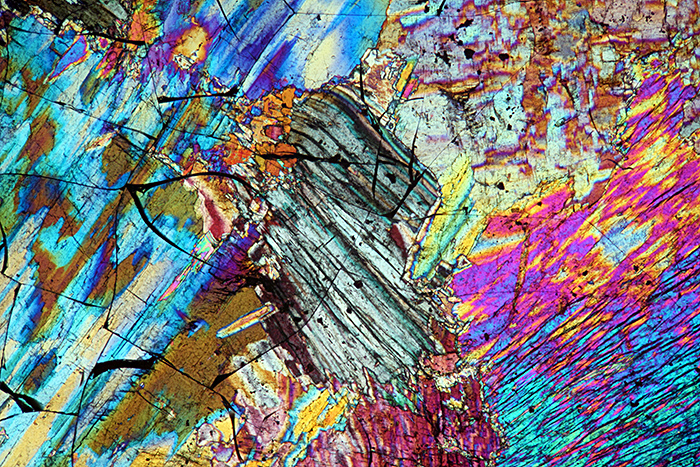 Thin section of sillimanite (crossed polarisers plus retarder)
He repeated the process with a slide of a mosquito larva and showed how polarised light produces colours in the muscles.
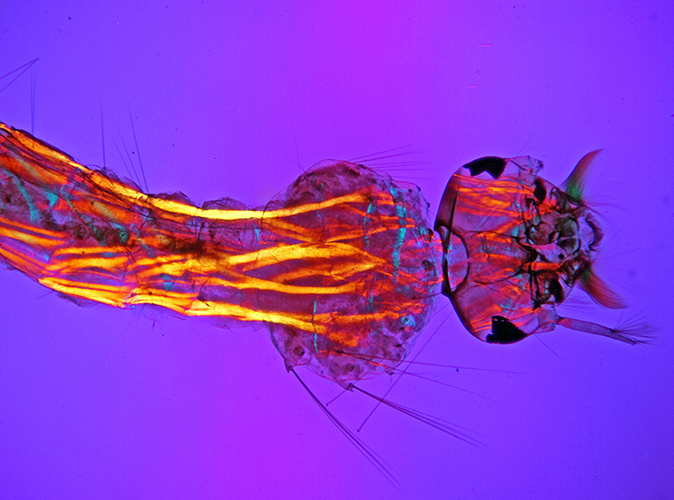 Muscles in mosquito larva (crossed polarisers plus retarder)
Alan’s presentation included links to sources of polarisers and retarders, and to Facebook groups with polarised light photomicrographs:
- Quekett Microscopical Club Shop
- Knight Optical
- Edmund Optics
- Crystal Art Photomicrography (Facebook)
- Amateur Microscopy (Facebook)
Les Franchi explained that circular polarising filters only work as microscope polarisers one way up because they incorporate a retarder; the retarder has to be below the polarising material. At the 2019 Annal Exhibition, Les demonstrated how to produce Rheinberg effects using polarising materials instead of colour filters; in addition to a polariser and analyser, he used a retarder below the condenser and a small polarising filter in the filter mount of the condenser. By rotating the polarisers and the retarder he was able to generate a wide range of foreground and background colours.
Steve Limburn showed a Wilson microscope from about 1730 that he had been given when a child by a friend of his father. He also showed an antique book, The Microscope Made Easy dated 1744 that included drawings of Mr Wilson’s Single Pocket Microscope and notes on the accessories. Steve has most of the accessories, including some lenses and a bone slider with specimens held between circular mica sheets by brass rings. He even has a small ivory box with spare mica sheets and brass rings.
Prompted by Jeremy Poole’s talk on diatoms, Steve also showed us a tray of diatom slides dated 1874 by Edmund Wheeler.
Gordon Brown recommended a mica window (available on eBay) as a retarder; he had obtained better results than with plastic films. He had obtained interesting results by holding the mica window at an angle instead of horizontal, supporting it with Soldering Helping Hands (available on eBay). The Helping Hands was also very useful for holding specimens for macrophotography at any desired angle. Gordon also suggested using 2, 3 or 4 layers of the clear plastic wrap from DVDs as a retarder.
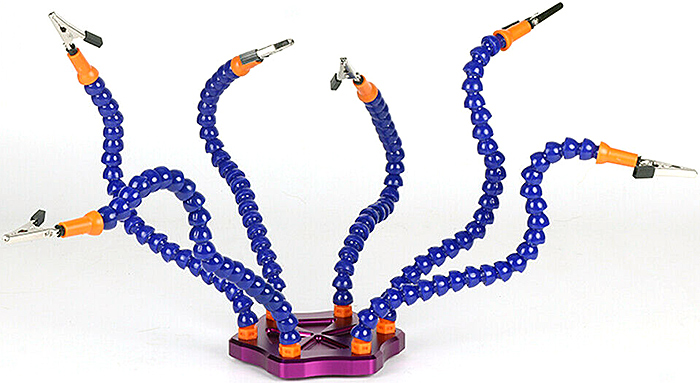 Soldering Helping Hands
Gordon also showed an annular mount for holding plastic film retarder, similar to the one that Alan showed in his PowerPoint presentation. They are easy to make from thin card (Gordon uses 300 gsm paper, Alan uses Kellog’s Corn Flakes packets) using a compass cutter (available on eBay or from craft shops). The clear central area is large enough to cover the light outlet on the base of the microscope, and the annulus is about 10 mm wide to make the mount easy to handle and reasonably stiff.
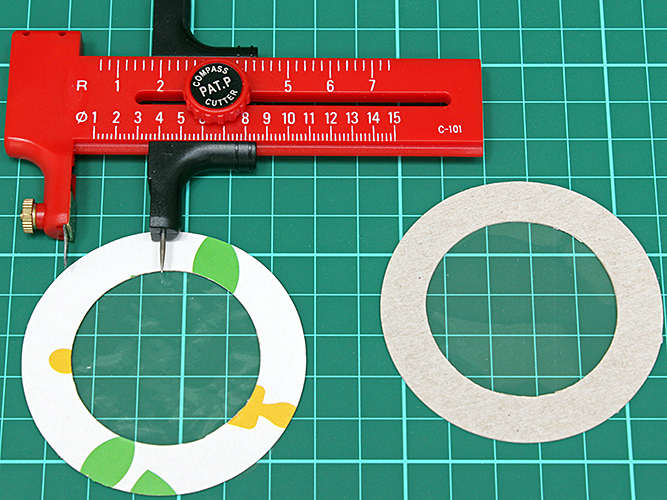 Compass cutter and annular card mounts for retarders
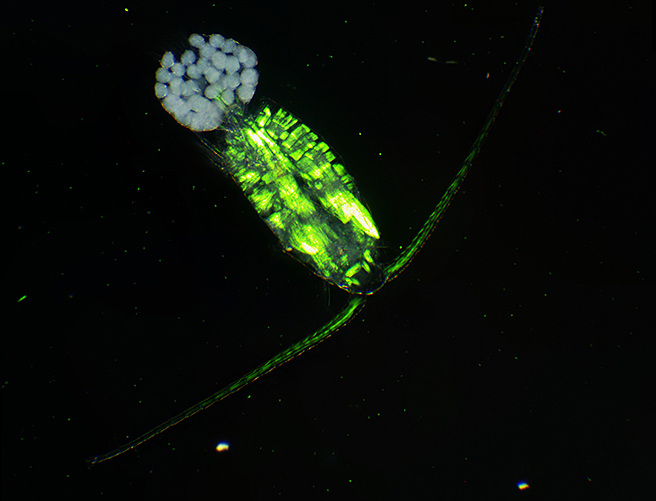
Tony Pattinson showed some photomicrographs of copepods with eggs, using dark ground illumination provided by an LED ring light instead of a condenser. He simultaneously used crossed polarisers plus coloured filters or a wave plate (also known as a retarder) on top of the polariser. The crossed polarisers make all of the muscles appear brighter.
 Copepod with eggs (dark ground plus crossed polarisers)
By using coloured filters on top of the polariser, and rotating the polariser, Tony found that he could brighten up all of the muscles with coloured light.
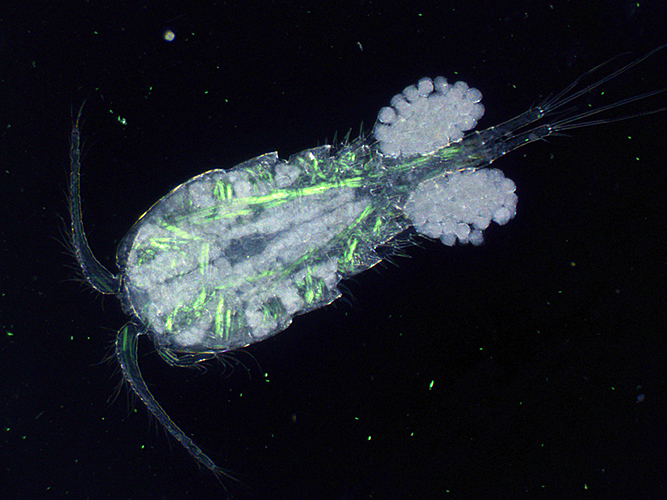 Copepod with eggs (dark ground plus crossed polarisers and green filter)
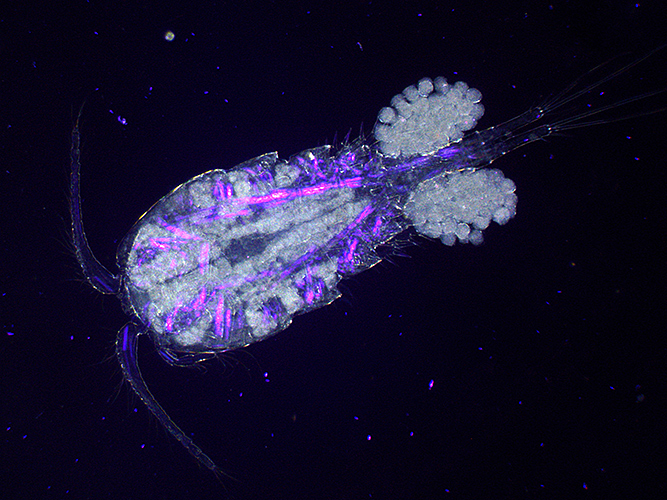 Copepod with eggs (dark ground plus crossed polarisers and magenta filter)
 Copepod with eggs (dark ground plus crossed polarisers and green filter)
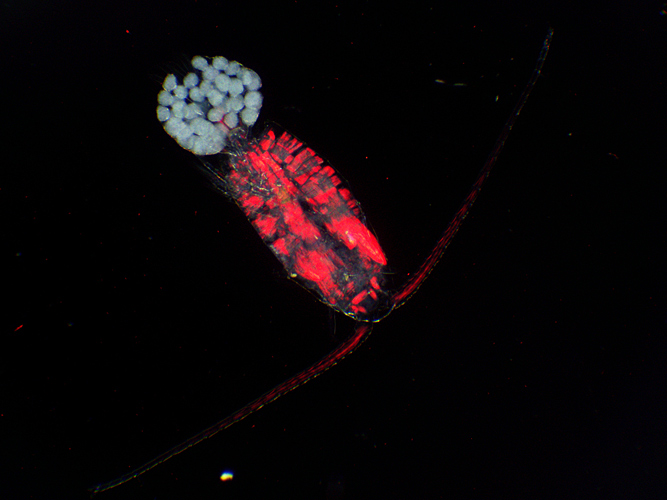 Copepod with eggs (dark ground plus crossed polarisers and red filter)
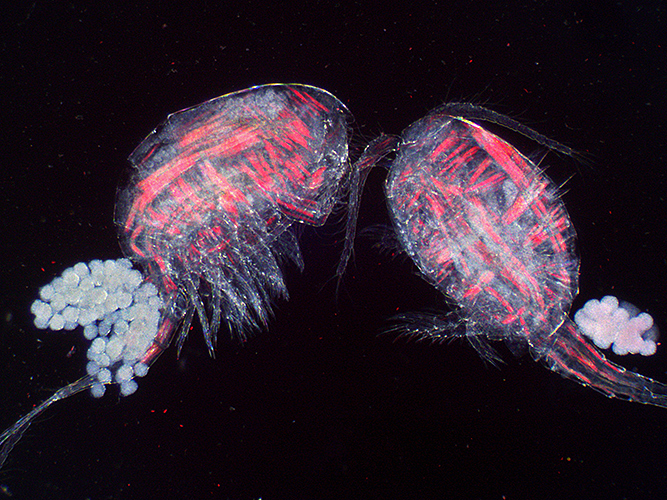 Copepods with eggs (dark ground plus crossed polarisers and red filter)
Using a wave plate (with no coloured filters) produces colours in the muscles that depend on the direction of the muscles. The colours can be changed by rotating the wave plate.
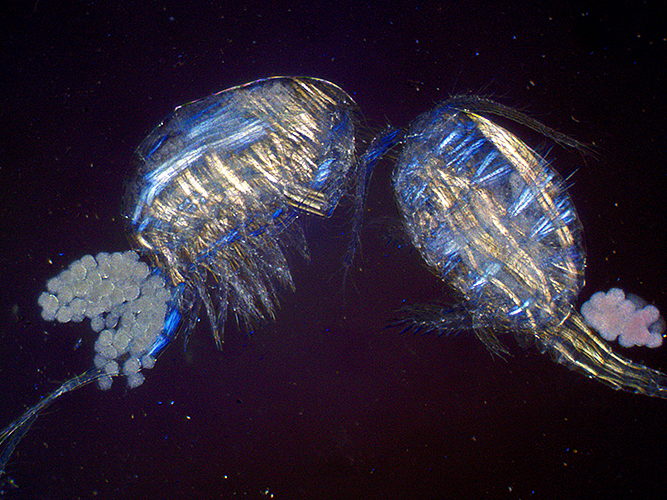 Copepods with eggs (dark ground plus crossed polarisers and wave plate)
Robert Ratford, in response to a question about lowering coverslips onto mountant without trapping air bubbles, recommended a vacuum pen (available on eBay) for picking up and releasing coverslips.
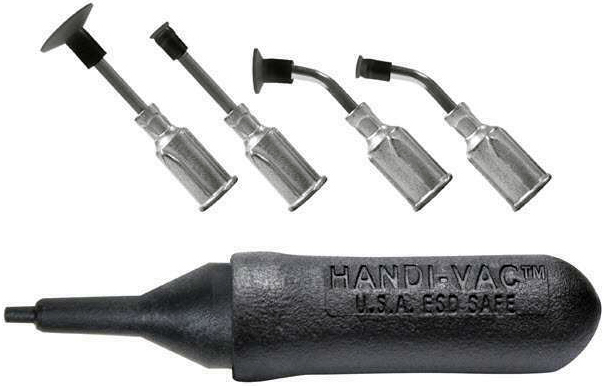 Handi-Vac with suction heads
After a break for lunch, Prof. Pippa Hawes, Head of Bioimaging, Pirbright Institute gave a lecture entitled “Studying the cell biology of virus-host interactions with light and electron microscopy”. She gave us an introduction to the Institute and explained what it is like to work in a high containment environment. African swine fever virus structure and morphology. Pathogens of farm animals . Predict viral threats, develop diagnostic tests, understand structure, genetics, replication and evolution, develop new vaccines.