

DIY phase contrast
By Tony Saunders-Davies
Shortly after writing the original version of my article on phase plates I received a polite, but well-deserved, slap on the wrist from Peter Evennett. Peter is an acknowledged expert on light microscopy, being chairman of the Light Microscopy Group of the Royal Microscopical Society. Peter pointed out that I was describing the construction of annuli not phase plates. Absolutely right of course! Here is the article as it should have appeared:
I do make phase plates (and modulation plates) and that article was a little ahead of what I intended to write about, and got sidelined from (excuse the contorted syntax, but I’m sure you know what I mean!). My method is not original – it’s based on a method that was shown to me by my old friend and mentor, the late Leslie Martin. Essentially the phase plate is produced from wax/soot deposited by candle flame on a coverslip, which is then placed as near as possible to the back focal plane of the objective. Having found the rear focal plane by the zero parallax method (Peter reminded me of this last time we met) I machine a ledge on the inside of the objective (with great care!) to take a brass holder to take a standard 6 mm, 8 mm or 10 mm coverslip at the required distance from the rear lens (of course modern objectives with the rear focal plane inside the elements are too difficult for the amateur, but a Zeiss DD and Watson Para both have unscrewable front components to the barrel and seem suitable). I make several of these holders at one time so that I can experiment with different types with minimum effort. I cement the coverslip before smoking. I then make the phase ring by nipping the brass holder in a split chuck in my Unimat and using a cocktail stick to wipe away the unwanted wax/soot.
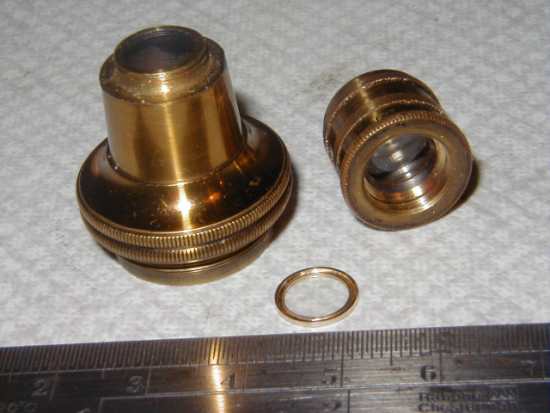 A Zeiss DD dismantled showing the ledge that has been machined in the front part to take a rebated brass ring to take a standard 8 mm coverslip which can be modified as a phase plate or modulation plate or for some other experimental use.
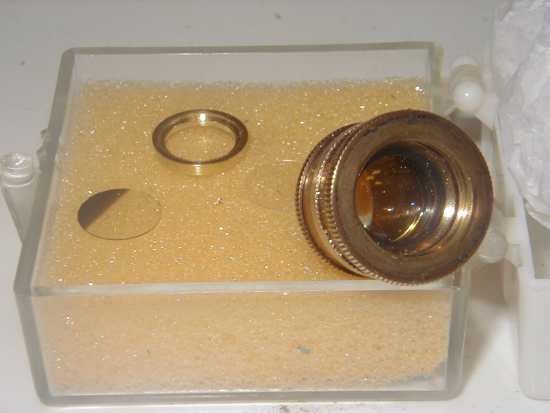 The same objective, but this time showing a modulation plate outside of its brass mount. I find these work best with a substage stop holder with a complete segment cut out to cover the smoked part of the coverslip
It is of course, difficult to know exactly how much retardation is produced by a plate made this way. ¼ Wavelength seems to be the value most quoted in commercial equipment, but presumably this is only true at one particular wavelength. If one uses white light then it seems probable that at least part of the spectrum will be shifted by this amount! Anyway the results are quite convincing.
The modulation plates are equally easy using a sort of pincer as shield. I usually find two levels produce the best effect. I was fascinated by your description of using the Nikon Coolpix 990 for photomicrography. I’ve been using an Olympus 2020 quite effectively as regards resolution and definition, but irritatingly I get vignetting with my favourite ×10 Zeiss WFK eyepieces. I may go for a Coolpix 990 but – curses! – the said Zeiss eyepieces have a 30 mm × 0.5 thread… Some nifty thread cutting called for I fear – and I can’t see how to dismantle these particular eyepieces with the idea of remounting the optics. If you have any ideas you might be able to tell me how to dismantle those lovely Zeiss eyepieces!
Its often quite easy to pick up second-hand phase objectives at very modest prices. You might think that the objective is not much use without the matching phase condenser with its associated annulus. Not so! In fact you may not even need an annulus if your condenser is accurately centred.
The first thing to do is to make sure you can see the back of the objective. If your eyes are good then no aid may be necessary. If not try a low power magnifying glass.
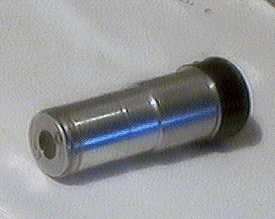
The proper equipment is a phase ‘telescope’. In my opinion the phrase is slightly misleading – in fact a low power microscope with a long working distance works well. As an enthusiastic lathe user I turned up one myself. The objective is a ×3, and the eyepiece is ×15. The whole thing is about 8 cm long, and I had to turn down the objective mount so it would slide into the microscope tube, but this in no way affects the utility of it.
 DIY phase telescope
The next thing is to work out the dimensions of the annulus (I assume you have the objective focussed on something like a diatom strew – something not too dense):
With whatever you’ve got take a look down the tube. You should see something like this:
Now you need to measure or record the inner diameter of the ring in the objective: you can use a caliper of some sort – vernier, dial or digital. Or even a simple pair of dividers, as here. Hold them underneath the condenser and adjust them to fit the inner part of the ring. If you are using dividers you can then lightly prick a piece of paper to record the setting
Now treat the outer diameter in a similar manner
Now you need to make an annulus to suit the dimensions you’ve just measured. I suggest you make the OUTER diameter a whisker smaller, and the INNER diameter a whisker larger than your measurements. A transparent plastic (I use the top of a Ferrero Rocher box!) is the easiest thing to use:
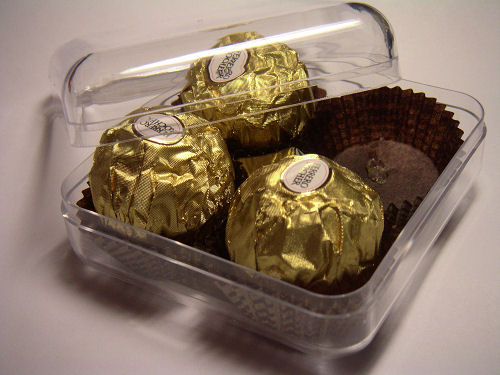 Ferrero Rocher box
- Cut a disk out to fit your filter tray.
- Put the disk in the tray and look down the tube without an eyepiece in place (or with the ‘telescope’ or magnifying glass), and use a fine marker to place a dot in the middle of the disk.
- Now cut a disk out of black paper to the inner measurement.
- Use something like Bostik to glue the paper disk to the centre – this allows you to push the paper gently if it’s not properly centred.
- Use a similar technique to make the outer part of the annulus.
That’s it! All you need to do now is to use the phase – try a swab from the inside of your cheek – epithelial cells make a classic phase object.