

Photomicrography workshop for Positive View
Tuesday 16th July 2024
Positive View is a charity that supports the less advantaged and under-represented 16–25 year olds living on our most challenging estates. As part of their ‘Youth Empowerment Programme’, Positive View is giving young people the opportunity to learn about and try their hand at all forms of photography. To give them an introduction to photomicrography, the Quekett arranged a one-day session using the microscopes in the Angela Marmont Centre in the Natural History Museum. The participants were accompanied by Hannah Lucas (Positive View), Louella Ward (Kent Downs National Landscape) and Victoria Nelson (Napier Friends).
Presentations – Compound microscopes – Stereo microscopes – Metallurgical microscopes – Special lighting – Phone and camera adapters – Computer programs and apps
Presentations
Graham Matthews: “Positive View Photomicrography”
 Graham Matthews’ presentation
Graham gave an introduction to photomicrography, including suitable types of camera, software for image stacking, compound and stereo microscopes, lighting and things to look at. He also showed us several of his photomicrographs of various specimens.
You can view the slides in Graham’s PowerPoint presentation here:
Click the arrows to move through the slides. Click the symbol at bottom right for a larger version.
Bevil Templeton-Smith: “Art photography using a microscope”
 Bevil Templeton-Smith’s presentation
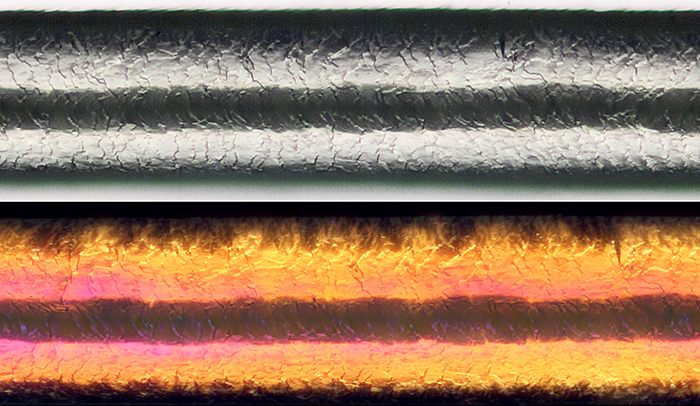
Bevil has been a keen photographer for about 25 years, with interests including astrophotography and macrophotography, but he did not consider using a microscope until 2021 when he saw a colourful image of an iridescent seed of purslane (Portulaca oleracea) taken by Yanping Wang using a stereo microscope.
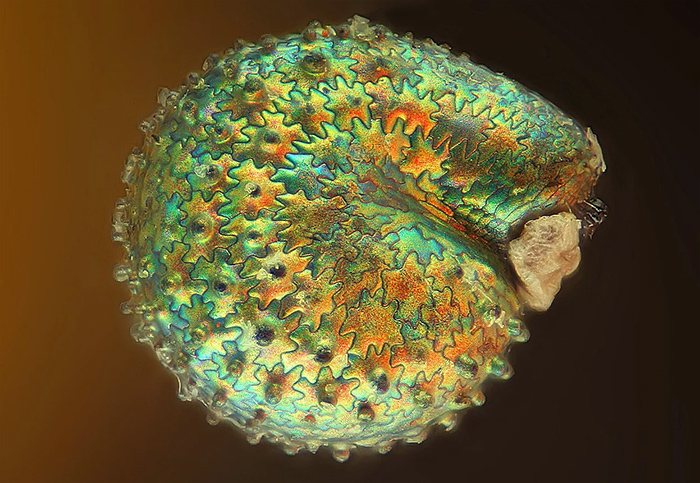 Purslane seed [By Yanping Wang]
Inspired by this image, he acquired a Baker stereo microscope on a boom stand and a packet of purslane seeds, but his photos showed only a dull brown seed. He did not give up, he bought his first trinocular Leitz Orthoplan in 2021, made an adapter for his Sony α7R IV mirrorless camera, and started taking photographs of crystals. It took him a while to realise that he needed a suitable eyepiece to get edge-to-edge sharpness, even with stacked images, and he obtained one from another Leitz that came with an Orthomat camera. He extracted the Vario-Orthomat zoom photo eyepiece that fits the 38 mm photoport and constructed an adapter to place his camera at the correct location. Then there was no stopping him, and he bought a succession of Leitz microscopes to obtain the objectives, polarisers, analysers and stages that he needed. For retarders, he uses mica sheets of various thicknesses and an assortment of plastic films. He examines each slide closely, and often selects just a tiny portion to photograph. He experimented with lots of chemicals, and his photographs started to attract attention. In 2023, there was an exhibition of his work called “Polychromo” at Alveston Fine Arts gallery in Notting Hill.
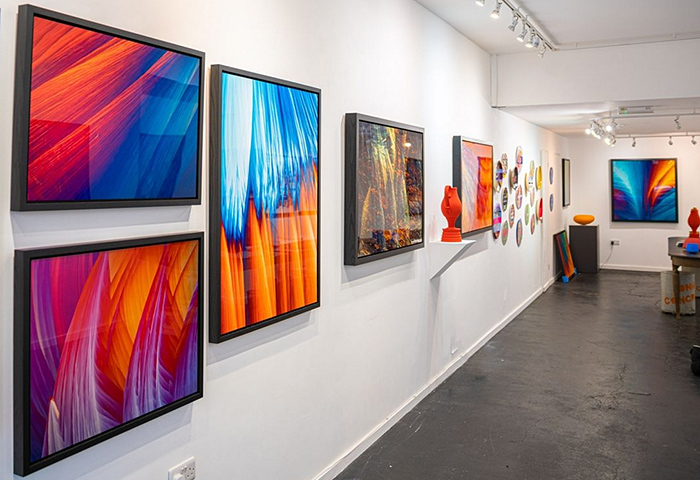 “Polychromo” at Alveston Fine Arts
Also in 2023, Bevil was awarded non professional Fine Art Photographer of the Year in the International Photography Awards. He still wants to take a good photograph of a purslane seed, and now he knows that he should probably use a fresh seed, not a dried one.
You can see several of Bevil’s crystal photomicrographs on his Facebook and Instagram pages.
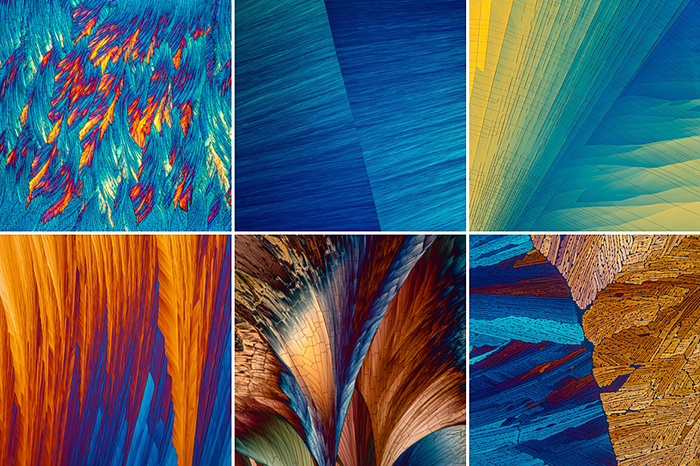 Some of Bevil’s crystal photomicrographs on Instagram
After the presentations, the participants were able to examine a wide range of specimens using compound and stereo microscopes. They were also able to try taking photomicrographs using their smartphones, the cameras provided by Positive View, and the adapters brought by Quekett members. Quekett members Pam Hamer, Graham Matthews, Jacky McPherson, Bevil Templeton-Smith and Alan Wood were on hand to provide advice and instruction.
 Louella Ward, Pam Hamer and Hannah Lucas
 Louella Ward using her smartphone
 Victoria Nelson, Hannah Lucas and Pam Hamer
Compound microscopes
Compound microscopes provide high magnification (40× to 1000×) but with very short working distance (a few millimetres at most). They are normally used with specimens that are thin and transparent or translucent, mounted on a 3″ × 1″ glass slide under a 0.17 mm glass coverslip. Small, thin specimens can be mounted whole, but many specimens have to be cut into very thin sections, often between 10 µm and 20 µm. Rocks are too hard to be cut into sections, so they are ground down to a standard 30 µm thickness. For specimens that are too thick to be mounted under a coverslip, there are special slides with a shallow depression or a raised ring. Specimens are usually lit from below with a condenser that concentrates the light (transmitted light), but some microscopes can also use reflected light.
Many thin specimens are almost colourless, but they can be made more visible by staining them with dyes or by using special illumination such as dark-ground or polarised light.
The Museum kindly allowed us to use their Olympus CX41 and CX43 compound microscopes for looking at the slides that Pam Hamer brought.
Graham Matthews brought a simple Baker Biolux school microscope that he has updated with a mechanical stage and LED lighting. Even this old microscope can be used for photomicrography, as Graham demonstrated using his Canon EOS 500D digital SLR controlled by Breeze DSLR Remote Pro software on a laptop.
 Baker Biolux with Canon EOS 500D camera
Pam Hamer brought some slides with interesting specimens, including crystals, diatoms, pollen, insect parts and onion skin.
 Prepared microscope slides
Here are some of the slides that were photographed for the following photomicrographs:
 Microscope slides
 Microscope slides
 Potassium chlorate crystals under crossed polarisers (left) and with the addition of a plastic film retarder (right) (4× objective)
Rocks and minerals usually have very little colour when they are ground down to 30 µm thickness. Adding crossed polarisers often introduces colours, and these colours help experts to identify some of the components. Amateur microscopists like to add retarders to add and change colours.
 Thin section of sillimanite (left to right: no polarisers, crossed polarisers, crossed polarisers + retarder) (4× objective)
Some biological specimens also show colours under polarised light, such as this midge larva where the muscles show as blue and orange.
 Phantom midge larva (Chaoborus) with crossed polarisers and a retarder [By Graham Matthews]
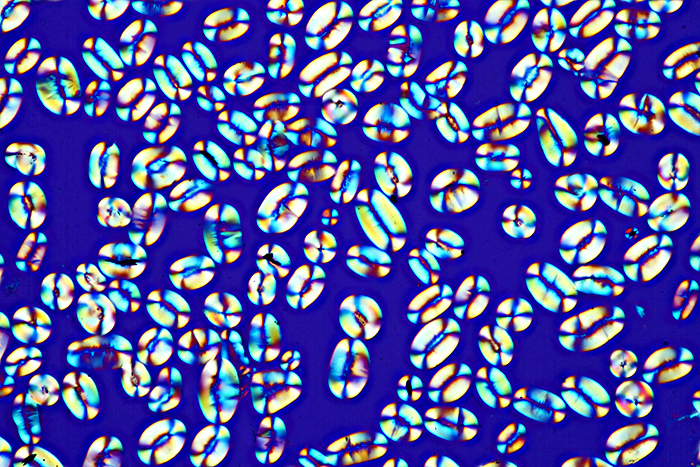 Starch grains from Calabar bean (Physostigma venenosum) (20× objective, crossed polarisers with makeshift retarder)
 Scales on the cuticle of human grey scalp hair (hair diameter 0.092 mm, 20× objective, with crossed polarisers in the lower photo)
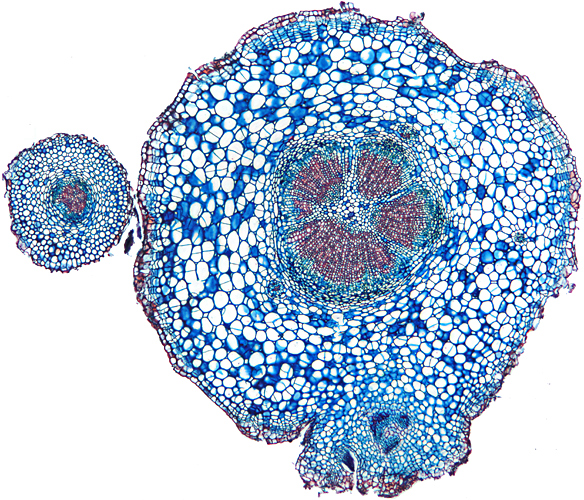 Section of root of daisy (Bellis perennis) (stained, 4× objective)
 Root tip of Allium, stained to show chromosomes (100× objective)
 Hairs on stem of a stinging nettle (Urtica dioica) (fresh specimen, not mounted, 4× objective)
 Pollen grain of mallow (Malva) (stained, diameter 150 µm, 40× objective,)
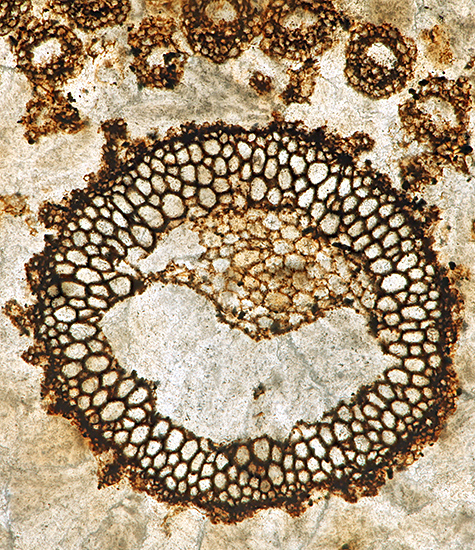
With the right equipment, sections can be cut from materials as tough as wood, such as this slide of teak:
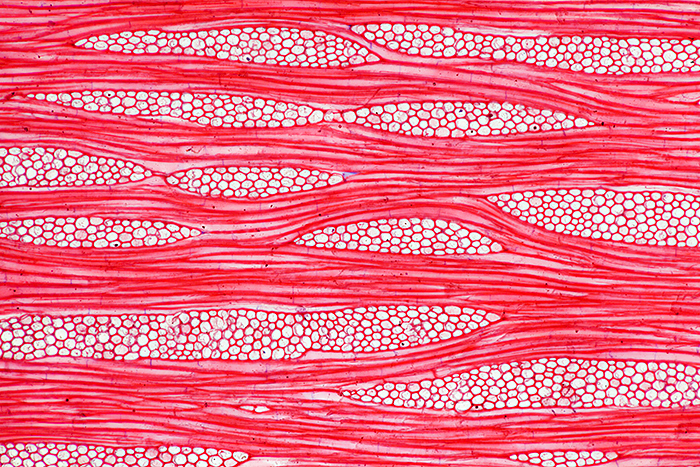 Section of teak wood, stained with safranin (10× objective)
 Fossil plant in coal from Oldham
 Stained section of a rabbit embryo (14 mm)
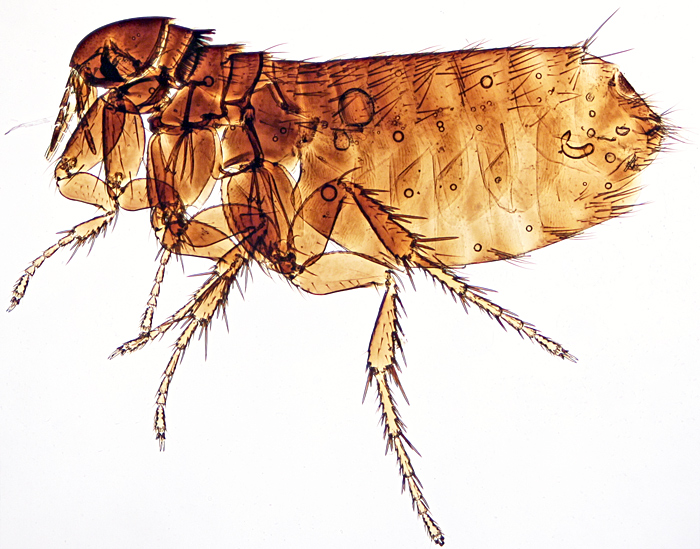 European chicken flea (Ceratophyllus gallinae) (2.6 mm)
 Pollen basket on third leg of worker honeybee
 Varroa destructor, mite ectoparasite of honeybees (cleared specimen, 1.65 mm wide, 4× objective)
 Anystis (predatory mite) using dark-ground illumination [By Graham Matthews]
Many digital cameras even allow you to take videos through a microscope
Waterfleas (2.5× objective) – Click the arrow to start the video
Stereo microscopes
Stereo microscopes provide good working distance (a few centimetres) but low magnification (6× to 45×) and are used with specimens that do not need any special preparation, although it is possible to view some microscope slides. Pam Hamer brought some suitable specimens, including feathers, flower heads, lichen, coins, leaves, a printed circuit, stones with microfossils and foraminiferous sand.
Stereo microscopes are usually used with reflected light, but some can also be used with transmitted light and even dark-ground illumination. The working distance is sufficient for lighting techniques that are used in studios. The equipment includes miniature ring-lights, spot-lights, diffusers, reflectors and shadowless illuminators, which can be used with black, grey, white and coloured backgrounds.
 Specimens for stereo microscopes
The Natural History Museum kindly allowed us to use their Leitz EZ4 stereo microscopes.
A few of the following photomicrographs are of specimens mounted on slides.
 Microscope slides
 Sand from Morecambe Bay (mostly minerals)
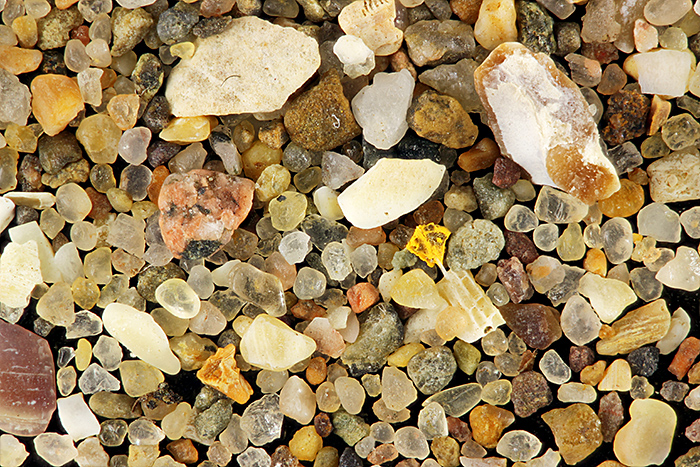
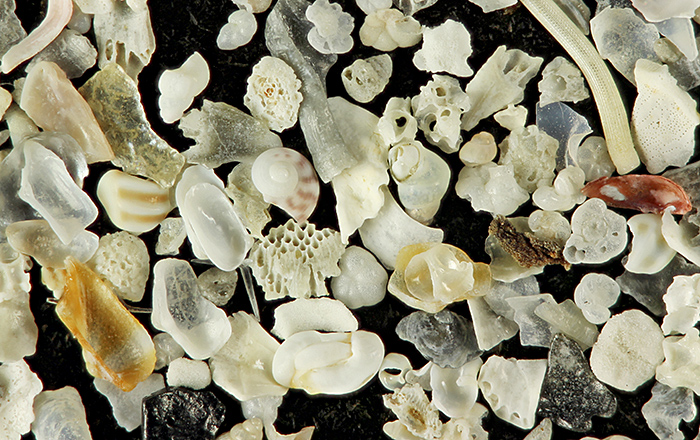 Sand from Dog’s Bay (calcium carbonate skeletons of forams, dry-mounted slide with black background)
 Peacock ore (bornite)
 Pyromorphite from Daoping Mine, Guangdong, China
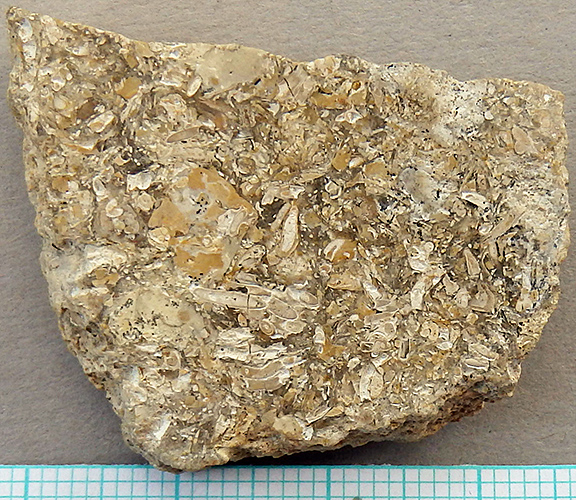 Microfossils in polished stone from Worbarrow Tout, Dorset [By Pam Hamer]
 Fossil fish
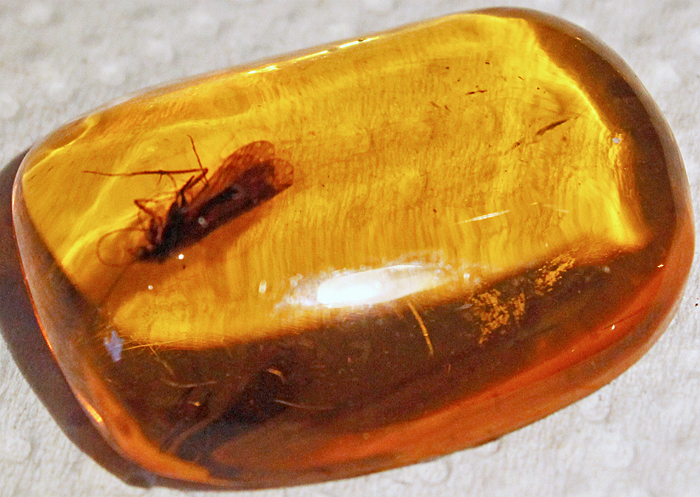 Insect in polished amber
 Geode
Geode
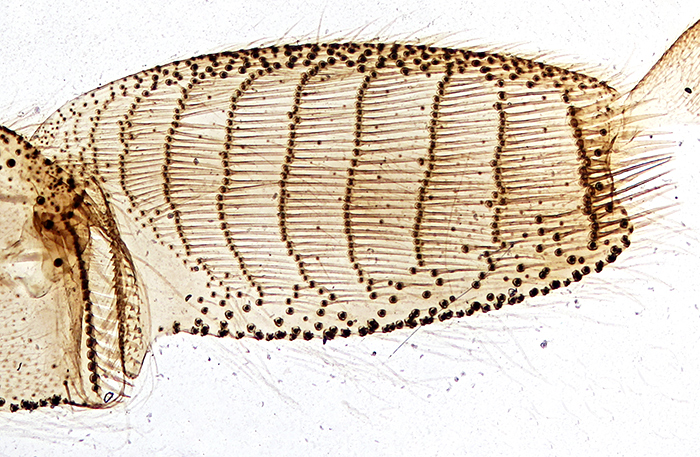
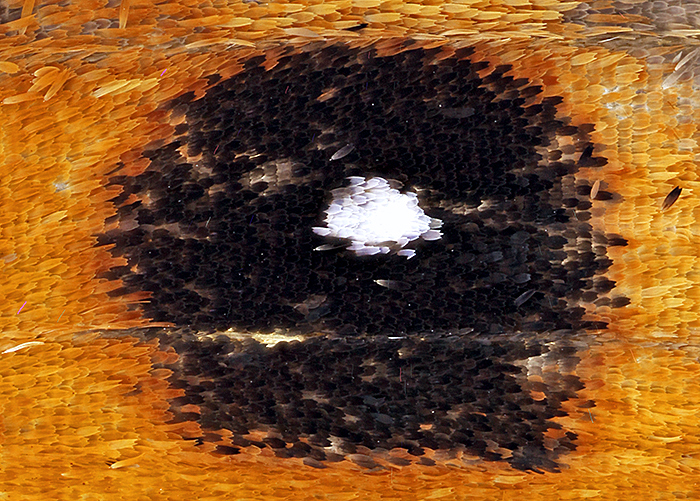 Eye-spot of a small heath butterfly (Coenonympha pamphilus) (1.2 × 1 mm)
 Soldier beetle (prepared slide)
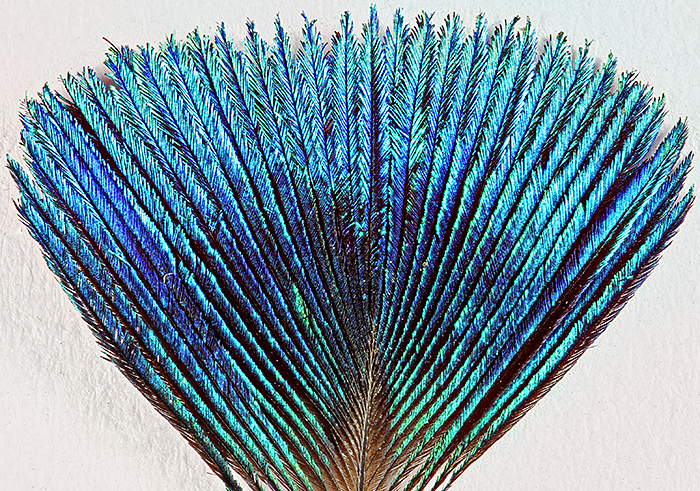 Corona feather of peacock (Pavo cristatus)
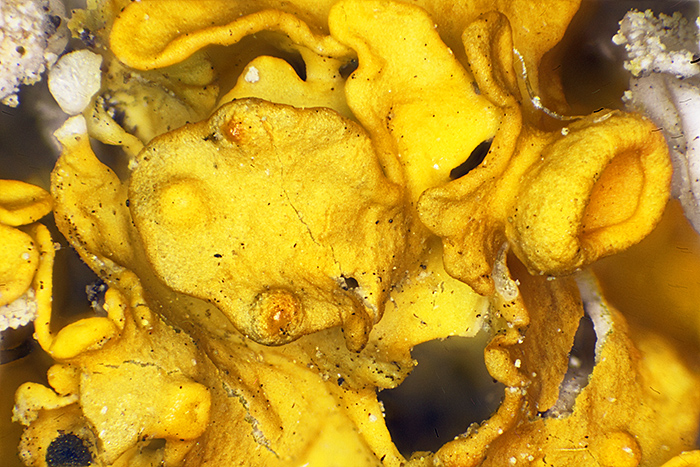
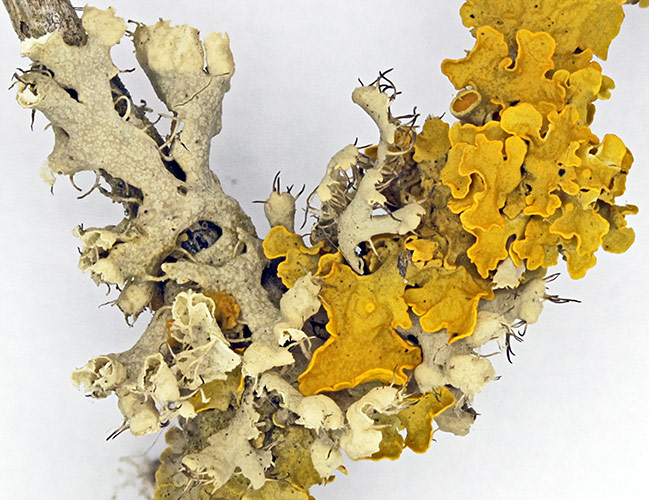 Grey and yellow lichens on a small twig
 Live aphids on grass
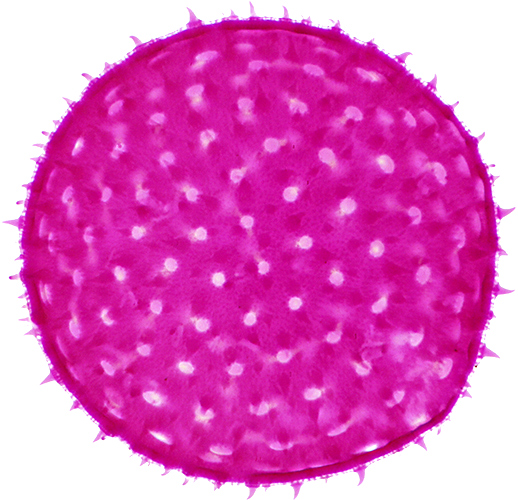
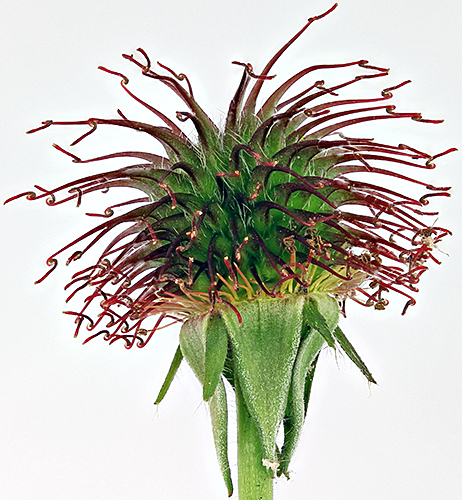 Burr of herb bennet (Geum urbanum)
 Pattern left by firing pin on a spent .223 cartridge case
 Printed circuit
Lighting can make a lot of difference to the way a specimen is displayed:
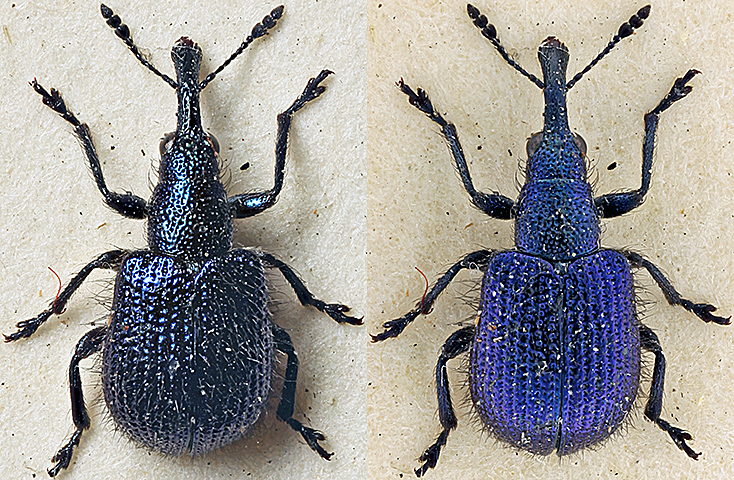 Iridescent weevil using a desk lamp (left) and a shadowless illuminator (museum specimen glued to small card)
With a bit of ingenuity, dark-ground illumination can be added to some stereo microscopes:
 Larva of a mosquito (Culex pipiens) (prepared slide)
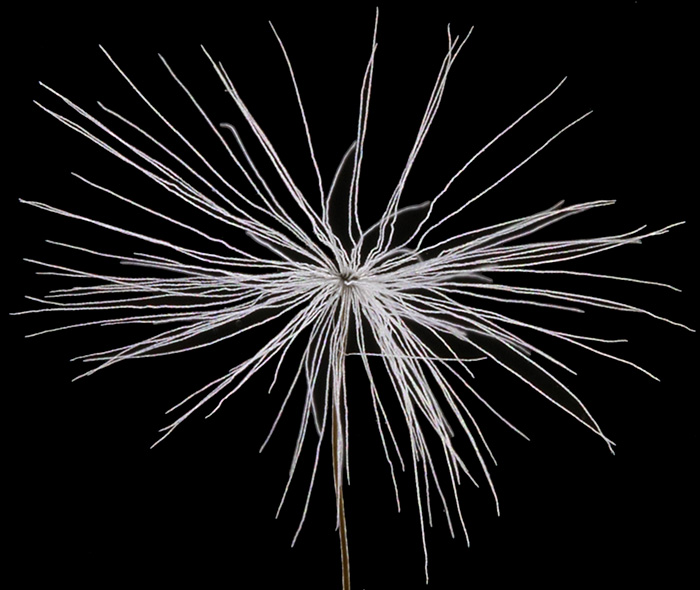 Seed of dandelion (Taraxacum officinale)
Metallurgical microscopes
Most compound microscopes are used with transmitted light, but some are designed for (or can be adapted for) reflected light. Alan Wood brought his trinocular Olympus CH-2 (a student microscope from the 1980s and 1990s) fitted with a reflected-light attachment. He mounted a Canon EOS 5D Mark II digital SLR on top, controlled by the free EOS Utility software on a laptop.
 Trinocular Olympus CH-2 with reflected-light attachment and Canon EOS 5D Mark II camera
This type of microscope is mostly used with metallurgical samples or other reflective specimens such as printed circuits. However, the lighting can be adjusted to allow paper specimens such as bank notes, stamps and biological specimens such as feathers, butterfly wings and lichens to be viewed.
 Specimens for reflected light
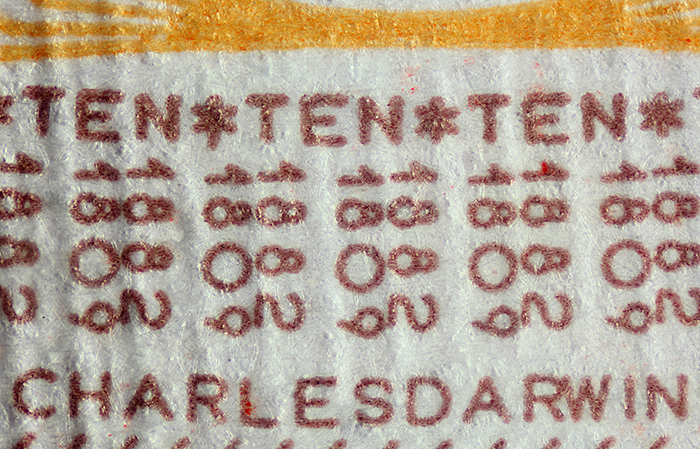 Microwriting on the reverse of a £10 banknote; the “D” in DARWIN is 0.4 mm tall
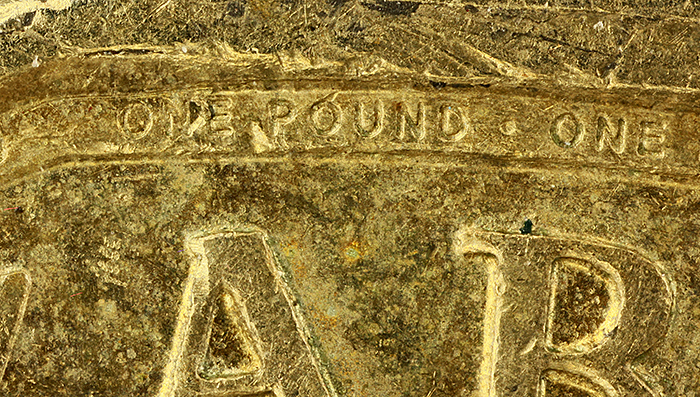 Micro writing on £1 coin (letters are 0.25 mm tall)
![]() Location of micro writing on £1 coin
Location of micro writing on £1 coin
 Yellow lichen (5× objective)
 Wing feather of peacock (Pavo cristatus) (5× objective)
- Read Alan’s handout on Using reflected light for photomicrography
Special lighting
For polarised light, you need two polarising filters. One (called the analyser) goes under the head, where there is usually enough space for a disc of film. The second (called the polariser) goes on top of the light outlet on the base; you need to be able to rotate this one, and you can use a polarising filter for a camera. Look through the microscope and rotate the polariser until the light is as dim as possible. Then put a specimen on the stage, and if it is birefringent then you will see colours.
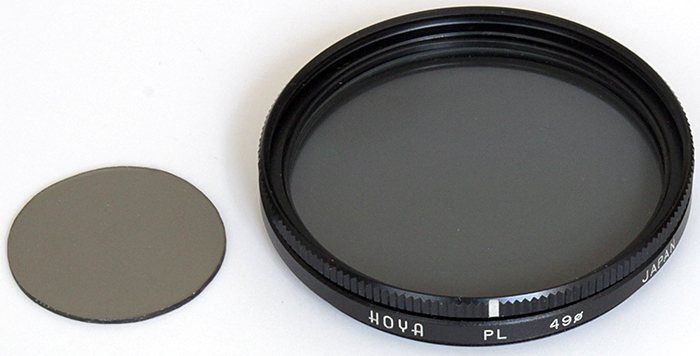 Makeshift analyser (left) and polariser
The colours produced using polarised light can be changed using retarders (also known as wave plates or tint plates). Many plastic films can be used as retarders, including wraps of greeting cards and CDs, and windows from boxes of pies and cakes.
 Sources of makeshift retarders
You can cut thin card such as cornflake packets to make holders for your retarders that rest on top of the polariser:
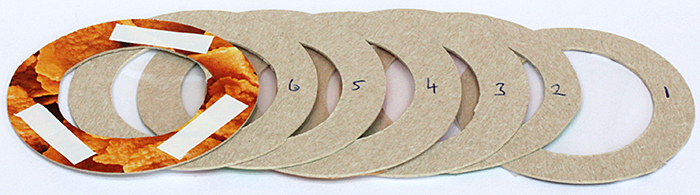 Makeshift retarders
You can change the colours that you see by rotating the specimen, the polariser and the retarder.
For dark-ground illumination with a compound microscope, you need a black disk that goes in the filter holder below the condenser.
 Condenser, filter holder and dark-ground stop
Phone and camera adapters
Adapters such as the ones that Alan and Graham used on their microscopes provide a firm attachment for cameras, but there are all sorts of other adapters available for attaching smartphones and small digital cameras.
For cameras with a screw thread for attaching filters, Brunel Microscopes sell their Unilink adapter. For cameras that do not have a filter thread, but have a ¼″ socket for a tripod, the Unilink can be used together with the Linkarm.
 Brunel Unilink and Linkarm digital camera adapter
For small cameras that have a ¼″ socket for a tripod, there are adapters that clamp onto the eyepiece tube of the microscope and allow the position of the camera to be adjusted.
 Clamp-on camera adapter
For smartphones, there are all sorts of microscope adapters on Amazon and eBay. Here is one that clamps around an eyepiece tube and has suction cups to hold the camera in the right position:
 Suction phone adapter and (on right) Phonescope
On the right in the photo above is a Phonescope. This does not use a microscope; it slips over a smartphone and provides 30× magnification.
Back when SLR cameras used 35 mm film, there were lots of simple T-mount microscope adapters available. They are no longer made, but used ones can still be found on eBay. They clamp onto a standard eyepiece tube with an external diameter of 25 mm, an eyepiece goes inside, and almost any SLR or mirrorless camera that has interchangeable lenses can be fitted on top with a T-mount.
A few microscope eyepieces were made with a 28 mm thread for attaching an eyecup. This makes them easy to use for a technique called afocal photomicrography, where the eyepiece is attached via a step-down filter adapter to the camera lens.
 T-mount microscope adapter (left) and Leitz Periplan eyepiece for afocal photomicrography
Computer programs and apps
Most microscopists who use digital cameras also use computer programs and apps to make life easier and improve their photomicrographs. There is software for:
- tethering (controlling a camera from a computer)
- image stacking (to increase depth of field)
- image stitching (to increase field of view)
- photo editing (improve your photos by rotating, cropping, adjusting contrast, adjusting brightness, lightening shadows, setting white balance, adjusting colour balance, retouching, sharpening, etcetera)
The Quekett maintains a page of links to sources of computer programs and apps.
Acknowledgements
Our thanks to the Natural History Museum for allowing us to the Angela Marmont Centre and their Leitz EZ4 stereo microscopes and Olympus CX41 and CX43 compound microscopes.
Report and most photographs by Alan Wood